Monday, April 26, 2010

Extra-Musical Mash-Up: Buttered Rum-Raisin Cream Pie with Partridgeberry Glaze

Yes, it could be prettier, but oh god, it was delicious. I took two recipes from Cooking Light Magazine and stuck them together to create what I think was a much better dessert. I felt like making a graham cracker pie crust instead of a normal pie crust, and I needed to get rid of the whipped topping and replace it with something else. I am also, as of late, making a ridiculous amount of custard, and this recipe was slightly different than Alice Medrich's multi-purpose pastry cream.

Crust:
1 cup graham wafers
1/3 cup sugar
1/2 tbsp molasses (or just use 1/3 brown sugar instead of the regular sugar and molasses. I like the taste of a bit of Crosby molasses better than the lack of flavor of the bagged brown sugar)
2 tbsp melted butter

Mix the ingredients together with a spoon and press into a 9" pie dish. Bake in a preheated 350 degree oven for 10 minutes. Done. Hurray. Next.

Filling:
2 cups golden raisins (I didn't have golden raisins and sultanas are not what you should use. I was out of luck, though. They just ended up a lot chewier and didn't plump up very much)
1/3 cup dark rum
1/2 cup sugar
3 tbsp cornstarch
1/4 tsp salt
2 eggs
1 1/2 cups almond breeze (or milk)
3 tbsp butter
1 tsp vanilla

Microwave the rum and raisins in a microwave-safe bowl for 1 minute. They were supposed to plump up, but nope. Apparently they don't absorb rum as well as I do. It seemed like there were way too many raisins for the amount of rum, so after a minute I stirred them to get the un-submerged raisins soaked in rum too, and then I re-microwaved the dish. I think I got drunk on fumes, but I wasn't going to mess with the amount of liquid in the recipe to get the raisins covered.

In a large bowl whisk the sugar, cornstarch, salt and eggs. Scald the milk in a heavy saucepan over medium heat until tiny bubbles start to form around the side of the pan (180 degrees on a candy thermometre. Don't let the milk boil. Almond milk won't curdle like regular milk, so it's not such a big deal, but it's a waste of time, it may still get a kind of skin, and it may scramble your eggs in the next step). Whisk the milk into the eggs in a thin stream, slowly enough to not scramble the eggs. then pour the egg mixture back into the saucepan and cook over medium heat, whisking constantly (don't use a metal whisk in a metal saucepan that shouldn't get scratched like I did...) until the custard is thick. Then I used Alice Medrich's trick of cooking for an extra 30-45 seconds after you think it's thick enough to make sure it was perfect.

Quickly pour the custard from the pan into a large bowl and add the butter. The recipe says add the butter to the pan, but if you don't have it there ready to go it can be dangerous to stop whisking the custard while you go to get it. You don't want the custard to burn and stick to the bottom of the pot, and it's not going to get too cool to melt the butter that quickly if you dump it immediately into another bowl before adding it.

Then stick the bowl into a pan of ice for 10 minutes until the custard comes to room temperature. A little water along with the ice helps cover more of the bowl surface area and cool it faster. When it's cool, remove it from the ice and stir in the vanilla and rum raisins. Then pour the custard into the crust.

My partridgeberry sauce was just a jam spread over the top of the custard, cheat that I am. A thin layer was all it needed. It wasn't too acidic, and the rich flavour of the eggs was nicely cut by the sweetened fruit. Alternately, you could make a sauce of puréed fruit (raspberries if there are no partridgeberries) with sugar and heated in a saucepan. Maybe add a drop of lemon juice after the sugar melts and you turn off the heat. You can also use gelatin or agar-agar to thicken it into a glaze or jelly. Garnish as you wish, maybe with some fresh berries or sprigs of mint. Ooh! Or maybe some kind of broken butter cookie pieces to match the graham cracker crust.

Absolutely delicious, and lighter than either of the recipes I mashed up separately. My music technology teacher probably would have given me an even better mark on this cream pie than on my final project mash-up of Jason Bajada's "You Are A Runner, I Am My Father's Son" and a cover of Sean Paul's "Beautiful Girls". Much more delicious this way and much less emotional. Girl Talk would probably still kick this pie's ass, though. No disrespect to the pie. Glee? Well, I don't have their budget. If I had the budget for pie that they had for their mash-up episode maybe my pie would win. I could at least bribe the judges with pie...

Halibut in Red Wine Sauce

Beppi Crosariol from the Globe & Mail was so kind as to do a little video on how to make a simple red wine sauce some time ago.

Sauté some diced shallots in a little oil. Add equal parts red wine and chicken broth (about 1/2 cup of each) and boil until they reduce by half. Turn off the heat and add a tbsp of balsamic vinegar or a tbsp of dijon mustard, or both. Maybe some fresh herbs, chopped.

He recommended searing and roasting some kind of meat, but fish would work fine, and when in Newfoundland...well that's not really true anymore. You can get all kinds of meat, local and not so local, but fish is still my first choice when I come home. Call me stubborn. It's the only time I'll buy cod and halibut. I could have poached the halibut, but instead I decided to sear it and roast it like Beppi's meat suggestion. Washed, patted dry with paper towels, sprinkled with salt and pepper, and then added to a hot skillet with a few tablespoons of olive oil over medium high heat. Browned on both sides and then the skillet went into the 425 degree oven for 10 minutes. Should have been perfect. Except the fillets were very, very thick, and they just didn't want to cook through. I left them there and still they were taking too long. I'd defrosted them in the fridge all day, but maybe they weren't completely thawed. Anyway, when they were finally cooked through the middle the outside was over-cooked. The man at the Fish Depot had even said these were lovely fillets. I was so disappointed. It's one thing to ruin mediocre fish, but good halibut? It's not even sustainable. It was a real treat.

Maybe that's God saying buy only sustainable fish and I will instill you with the divine strength and ability to cook it properly. Fish should be so simple. It didn't ask to be over-cooked. I poured the red wine sauce (with both dijon and balsamic) over it and tried to drown my sorrows in sub-par cooking wine sauce with the alcohol evaporated out of it. Not as effective as a glass of the stuff, but much more delicious...

God = 1; me = 0; halibut = tough and abused

Mackerel Nanbanzuke

This recipe was recommended to me when I wanted to make smelt. Very sustainable, smelt. Small and fishy, like sardines. I wanted to form an opinion on the fish, having never tried it before. Unfortunately, I looked in three supermarkets and one fish shop the day I wanted to make this and suddenly all the smelt had disappeared from St. John's. Who knows why? Here one day, gone the next. That's definitely more understandable with less sustainable fish. Probably it just didn't come in that regularly because not many people buy it. I mean, how many people go out of their way to buy the reject fish that most people don't want?

I did find fresh mackerel at the Fish Depot downtown, and bought some of that. Close enough for jazz. It got chopped into bite-size pieces. The other nice thing about this recipe is that it meant I got to buy a bottle of sake (Japanese rice wine). I don't particularly like drinking this sake (there was only kind, the Hakatsuru draft sake, at the liquor store), but it's great for cooking and means I need to come up with more Japanese recipes to use it up.

Ingredients:
2lbs mackerel
1 inch ginger, grated
1 tbsp sake
cornstarch (potato starch is more traditional but cornstarch works the same)
1/2 cup vinegar (it just says "vinegar" but rice vinegar is probably standard. Regular white vinegar worked fine, though)
1 1/2 tbsp sugar
1/2 tsp salt
1/4 tsp soy sauce (or tamari)
1/2 an onion, thinly sliced
1 lemon, quartered and thinly sliced

1. Sprinkle the bite-sized pieces of mackerel with the sake and ginger...hmm...the recipe says to then pour out any liquid. I figured I'd toss the mackerel a little in the sake to make sure it got all over the fish.
2. Dust the fish with cornstarch (or potato starch) and deep-fry it in hot oil until lightly browned. I'm not such a huge fan of deep-frying, and mostly just afraid of over-cooking or not cooking enough, or not having the heat right. When deep-frying is done right by someone who knows what they're doing, it's a good way to cook. By me? Not so good. So I decided to fry in about 2 tbsp of oil. The pieces were small and they cooked quickly. I tried really hard to not overcook them and make them tough. I didn't want to just sear the outside, though, and leave the inside uncooked. Delicate balance. I think I fell off the proverbial see-saw, unfortunately. Searing didn't make a whole lot of sense, in retrospect, with such small pieces of fish.
3. Toss the hot fish in the combined sugar, salt, vinegar and soy sauce mix in a bowl. Then layer some onion slices, some lemon slices and then some fish. Repeat the layering until you run out of slices and fish. The recipe is a bit ambiguous about when to layer and when to toss...after the layering? Before the layering? I did a bit of both to be safe.

The recipe is to be served warm immediately or cold the next day, but I highly recommend the cold the next day option. The sugar from the vinegar, sake and the added sugar itself soaked into the lemon and kind of candied it. I wanted to keep eating lemon like a snack. Kind of like if lemonade came in fruit form. The fish was mild enough that the vinegar stuck out, and made a good pairing with the simple flavours of the Korean jap chae. Sesame didn't really go well with the fish, though, so I think a bowl of steamed rice would be a better idea. The noodles benefited from the vinegar, and I can't really complain about the fish. The other nice thing about waiting until the next day to eat the fish is that the fat solidifies and you can avoid it. Or you can eat it, or melt it over your rice or noodles. As you wish. I am far from traditional, and I apologize for that, but I don't think I messed the dish up horribly all things considered. The upside is now I'll know what the dish is when, or if, I see it on a menu. All in the name of cultural education...and dinner. Next time I see sea smelts...

Jap Chae Korean Noodles

I used to live next to a Korean church on Bloor Street in Toronto. It was on the edge of Korea Town and my 3 years of living and going to school in the area introduced me to the wonders of pork bone soup, 24 hour amazing (and awful) BBQ, steamed walnut red bean dough balls, and decent (and, again, awful) sushi. It wasn't until my last summer in the area that the church started having weekly yard sales. Besides buying a $1 Disney puzzle of Tokyo, I would often stop by to look at the older ladies cooking omelets and some kind of sesame noodle dish. Fortunately, the convenience store down the road also had take-out noodles that looked about the same, so despite our language differences, my timid inquiries of "Jap chae?" were well-received. Unfortunately by then I'd basically stopped eating pork, and that was one word not in my Korean vocabulary. Without knowing what was in the noodles, I avoided, and avoided...until I caved. Of course I caved. The key to avoidance is 'out of sight, out of mind' and when you walk past the yard sale every week it's hard to put that into practice. Crossing a major intersection with my eyes closed didn't seem like the best idea.

So when the fine people at Food & Drink put out a complimentary magazine through the LCBO (Ontario liquor stores), I was pleasantly surprised to find a large selection of really interesting recipes. This was not the Kraft recipe magazine sponsored by Our Compliments that comes in the mail and you should promptly throw out. They had a full section on "Asian fare" that went far beyond adding soy sauce to rice with chicken. The recipes weren't even that dumbed down. Sure they skimped on the hot sauce, but how many free magazines come with a recipe for pickled carrots and daikon? Kim Chi dumplings (mun doo) or beef bulgogi with 16 ingredients. This was not a "go to a Korean grocery store and buy bulgogi sauce" cop-out.

Jap Chae is really simple, and with a good sesame oil, or, with enough of a good sesame oil and brown sugar, it's addictive. Don't like spicy? Don't add a lot of chili paste. My only complaint is that their recipe didn't call for any rice vinegar. I'm not sure if that's traditional, but I thought the noodles needed a little kick. Fortunately I made them with a marinated Japanese mackerel dish that had more than its fair share of acid. It worked out perfectly, even if the combination was less than authentic than the individual recipes.

Ingredients:
200 grams sweet potato or yam noodles (these are supposed to be a bit sweeter than rice noodles, but they follow the same quick-soaking rice noodle concept seen in a lot of Thai dishes. I substituted rice noodle vermicelli and it worked fine)
2 tbsp vegetable oil (not sure why this is vegetable oil and not sesame oil...)
2 cloves garlic, chopped
2 onions, thinly sliced
1 cup carrots, cut into matchsticks
1 red pepper, thinly sliced
6 shiitake mushrooms, thinly sliced, stems removed (I didn't have any. Obviously it's better with, but it's a stir-dry so it's not the end of the world to leave things out or substitute, as long as you know that the end result will not be the same, and you're not drastically changing the recipe and expecting the best results. Don't get angry at the recipe when it's not a great meal)
1 bunch (4 cups) fresh spinach, stems removed (I used a container of organic baby spinach. Wasteful packaging, but all that was available)

Sauce:
3 tbsp soy sauce (or tamari)
1 tbsp sugar
1 tsp Korean red pepper paste, or 1/2 tsp Asian chili sauce (I used 1/2 tsp of my Guizhou Chili Paste. Not Korean, no, but incendiary)
1 tbsp sesame oil (toasted would be a stronger flavour, I think)

2 tbsp cilantro, chopped
1 tbsp sesame seeds, toasted (I left them out, but they do add a lot to the dish)

Every recipe says to cook yam noodles and rice rice noodles a different way. This one worked well, and I think I'll keep it as my standard. Add the noodles to boiling water and boil 5 minutes. Drain and refresh with cold water. Drain again. Simple. I didn't end up with chewy noodles.

The sugar, chili paste, soy sauce and sesame oil got combined in a small bowl to wait while the vegetable oil got heated in a large frying pan.
Now the stir-frying fun. The garlic got added to the hot oil. 30 seconds later the onion and carrot went in. 1 minute later the red pepper and mushrooms. 2 minutes later the drained noodles and the spinach. 1 minute later the combined sauce from the small bowl. 2 minutes later it was poured into a large platter, topped with cilantro and sesame seeds (not mine, but yours can be) and devoured (both mine and yours). So quick. The nice thing is that if you don't like the final seasonings, you can adjust them. More soy or chile paste. Or serve with a vinegar. Chinese would go with black vinegar probably, but for Korean I wouldn't know what to do. I just knew it needed something. Without it it's just a simple, sweet dish. Some people like that, I hear.

Home-Made Fettucine with Lamb Tomato Sauce

This started from wanting to make the basic tomato sauce recipe from Josée di Stasio's A la di Stasio. Then I got a little ambitious.

I decided to re-make the Kazakh Noodles from Beyond the Great Wall, but skip the stretching by hand step and the hanging (even if I'd had a clothes rack...). I also decided not to fling anything this time, though my floor in Newfoundland is probably cleaner than my floor in Montreal. I also wanted to use up some red wine and found a traditional tomato sauce recipe that called for brandy. I only had cognac. Not the end of the world, certainly. Finally, I decided to add ground lamb to the sauce.

Lamb Tomato Sauce
1 tbsp olive oil
1 onion, diced
5 cloves garlic, finely chopped
1/2 cup red wine
1 28 oz can diced, crushed or whole tomatoes (purée them in the blender or food processor if they're not already crushed or you want them more than diced)
sprinkle of sugar (optional, if you don't use naturally sweet San Marzano canned tomatoes)
1/4 cup parsley
2 tbsp dried basil (only because I didn't have very much fresh. I know, I know. Not good, but I did throw in the fresh basil that I had)
3 tbsp brandy (or cognac)
1lb ground lamb

First I fried the lamb in a skillet until it wasn't pink anymore. Then I drained the excess fat. I know people are giving me dirty looks right now. Draining all the flavour, but it's not completely true. Lamb is very fatty and I didn't drain it all. Just enough. You can drain to your preference. You can even save the grease to sauté or roast other things in later. It doesn't have to be wasteful. Lamb fat-roasted potatoes? Yes, I think so.

In a large saucepan I sweated the onions for 10 minutes, covered, in the olive oil over low heat. Then I added the garlic and fresh basil and cooked, covered, for 5 minutes more, making sure it didn't brown. Apparently cutting into the cloves of garlic and removing the green germ (or sprout) makes the garlic less bitter, and for a sauce this is definitely good. I've never done it before, but it's something to try. Browning also makes it more bitter, so keep the heat low.

In went the wine. Oh I love that part. Even if it's not great wine, especially ifi t's not great wine, it's wonderful to toss it in and know that the sauce will be that much better. I let it reduce by half and then I added the can of tomatoes (no San Marzanos in Newfoundland), a pinch of sugar, the dried basil, most of the parsley, and the browned ground lamb. I decided on a whim to throw the whole thing into the slow-cooker on high for a few hours. This had to be better than just simmering it on the stove for 20 minutes. What about all those stories of pasta sauces cooking for hours and hours? I'd fake it with the slow-cooker. I let it cook until I wanted to eat (about 2 hours) and then added the rest of the parsley and 3 tbsp of cognac. Then I let it cook about 20 minutes more on high and finally turned off the machine. During the cooking time I made the noodles:

Kazakh Noodles
This made a whole lot of noodles. About 8 large servings.

3 1/2 cups flour (I used rice flour, fully knowing that the dough would not want to cooperate and would probably fall apart and hate me forever. My family's digestion, on the other hand, would love me)
1 tsp salt
2 eggs
3/4 cup lukewarm water (my pasta-maker would disagree with this large amount, but my pasta-maker is also not in Newfoundland to berate me)

I stirred together the flour salt and eggs in a medium bowl. It's easier to do it in a food processor but I don't have one of those either. I also hate whisking eggs with flour. It gets stuck and is annoying to clean. My dough would not be fluffy and I was okay with that. I made a well for the water in the dough, poured it in and mixed it together with my large spoon. Then I gave up on the spoon and jumped in with my hands. Take that, egg. The recipe says if the dough is too stiff or too dry add more water, but there were no telltale signs of over-dryness, no small clumps forming in my pasta-maker, so I was left running blind and hoping that my dough would be okay. Then I did my horrible rendition of kneading for 3 minutes. The dough got cut into 4 pieces and rolled out with a rolling pin. What I was actually supposed to do was cut the dough into 8 pieces, leave them covered with plastic wrap for 30 minutes, and then attack each piece individually with the rolling pin, but I didn't read that variation in the recipe until it was too late.

I rolled and sliced into fettucine-sized noodles with a very sharp knife. The only problem was the noodles broke easily, but as long as I handled them carefully when I tossed them into the boiling water it was fine. They were a bit thick and took about 8 minutes to cook even though the dough was fresh (they're supposed to be ready when they rise to the top of the big pot of boiling water, but maybe rice flour doesn't act quite the same?). Anyway, they got drained and rinsed with cold water to wait to be served with the lamb tomato sauce.

Bit of pasta on the plate, lots of sauce, side dish of steamed swiss chard and a green salad. Olive oil.

Chinese noodles, Italian tomato sauce and Australian lamb never tasted so good. The fun thing is you'd just think it's fettucine in a tomato ragout. Sometimes I love culinary magic tricks.

Friday, April 23, 2010

Catch of the Day: Trout in Orange Sauce

I hate orange in sauces. So why did I make this recipe? Some yoga-induced state of insanity? Nope.

I made it because I wanted to make a fish recipe from Josée di Stasio's A la di Stasio, of which there are only two, and I'd already made the other one twice. I didn't feel like shrimp or a salmon burger and there's something really beautiful about a simple fillet. I also felt like this might not be an orange disaster since US navel oranges are just on the end of their season now (by the time they ship to Newfoundland, that is. Everywhere else, the season is done apparently). They're so sweet and not very acidic. Simply put, they don't taste like tropicana.

Add butter, and you're golden. If I'd been in Toronto I would have bought black cod (aka sable fish or omble chevalier), since the flesh of the fish already tastes like butter, so you wouldn't actually need to add very much of the stuff to feel very French and fat. And happy.

4 150g trout fillets (or black cod if you can find it. Really, you can use any fish. Definitely any firm white fleshed fish, but salmon, trout or char are all good. Butter goes with everything. Maybe not the tuna you can get in Newfoundland, but a good fillet of a fattier tuna might be nice. Who knows?)
olive oil
salt and pepper
zest of 1 orange (or 2 if you use navel oranges and they don't give up much zest)
Juice of 3 oranges (1/2 cup. Mine were many pulpy, so it took quite a few)
2 tbsp fresh lemon juice
4 tbsp butter, in cubes

If you use a good quality butter you won't need more than this, but if your butter isn't the best, you may end up using more to try to salvage some flavour. Unsalted butter works well since you season with salt and pepper at the end.

Oven went to 425 Fahrenheit, and a baking sheet got lined with parchment paper (easy clean-up. No scrubbing fish bits off baking sheets. Kind of wasteful, but what you waste in paper you make up for in water so I figured I'd come out even).

Zest and juice oranges and juice lemon. Wash the fish in cold water and pat it dry with paper towels.

I used a brush to coat the fish in olive oil, but you can just drizzle it if you prefer. Painting it spreads the oil more easily without hurting the flesh of the fish with your hands. Then I sprinkled both sides with salt and freshly ground pepper. Skin on or off??? I went with on to keep the fish moister in the oven.

Then into the oven for 10 minutes. In the meantime, the citrus juices and zest got brought to a boil in a saucepan on high heat, and cooked for 1 minute (still on high heat to reduce the sauce). Then a little bit of salt and pepper to taste. Whisk in the butter. That was honestly all you had to do with the sauce. Orange juice, lemon juice, orange zest, boiled for 1 minute, add salt, pepper and butter. Genious.

These were thick fillets that didn't want to cook evenly, so after 10 minutes the ends were done, but the rest wasn't. I hate over-cooked fish, so I served the ends right away and put the rest of the fish back in for an extra 2 minutes. The hot sauce gets ladled over a fillet on each plate.

I even served the dish almost exactly as di Stasio recommended, mostly by accident. Basmati rice and bok choy. Well, pak choi. Close enough. The rice soaks up the extra sauce, so don't you dare add butter or salt to your rice. Plain is what the recipe needs. Same for the pak choi. In fact, the next night I steamed more pak choi and tossed it with the leftover orange butter sauce. It was perfect. It also made for a beautiful (un-photographed, sorry) plate, with the green of the vegetable leaves contrasting with the orange sauce. The freshly ground pepper made all the difference in the world, adding visual texture to the fish. So simple, so fresh. Just enough butter to taste rich, while being careful not to give too much sauce per plate. Rice should not swim in orange, and the trout had done enough swimming for its lifetime.

Wednesday, April 21, 2010

3 Newfoundlanders Walk Into A Bar (Hasty Pudding vs. Brownie Pudding)

Hasty pudding is essentially the same recipe as brownie pudding except for two key ingredients. It calls for chopped dates (which is hilarious because they're the most time consuming part of the otherwise 'hasty' recipe) while brownie pudding calls for cocoa in its fudge sauce. The whole idea of both desserts is to make a simple, brownie-like batter (you can even include walnuts if you're into that sort of thing) and then pour over a water-based sauce. When the pudding bakes, the sauce soaks through and under the batter and you end up with brownie and hot chocolate sauce all in one dish. It's incredible comfort food, and actually not even that bad for you. I mean, it's not good for you, but there are worse things to put in your body...

...like 3 beer, 2 shots and two rum and cokes. Okay, so for some people this is an average night, but Rock Star does not enter my body. Ever. Just as rarely does coke. And Bud Light? Once in a poor, poor blue moon, and only out of consideration for the person who blindly purchased it for me. Neither do I start drinking at 2am and finish at 4:30am. My body just can't handle it. Refer to my post on being a grandmother - How to Crash A Tea Party, and Other Stories - if you don't believe me.

Every now and then you need to break out of your comfort zone. A nice fellow from the Goulds, as it turned out, swooped me under his wing and off to my 4th Juno party of the evening (the weekend leading up to the Sunday evening music awards show was the most amazing deal on copious amounts of decent to really good Canadian live music to grace downtown St. John's since 2002. A special occasion, so I think I can stay up past my bedtime, putting my grandmotherly tendencies on vacation. Little black dress, high heels.

The fellow from the Goulds' friend, a Bayman from the Southern shore (of Newfoundland, for anyone who doesn't know what that means) was a bit quieter, always talking up his friend and buying me a few of those aforementioned 7 drinks.

So the debate begins. Hasty pudding or brownie pudding?

Hasty Pudding
1 cup flour
1/3 cup brown sugar
1 tbsp cocoa
1/4 tsp salt
1 1/2 tsp baking powder
1 tbsp butter or margarine
1 cup chopped dates (or raisins, if you must)
2/3 cup almond breeze (or any kind of milk)

Sauce
1 cup brown sugar
1 tbsp flour
1 tbsp butter
1/8 tsp salt
2 cups boiling water
2 tsp vanilla

Versus

Brownie Pudding
1 cup flour
1/2 tsp salt
2 tbsp cocoa
2 tsp baking powder
3/4 cup sugar
1 tsp vanilla
1/2 cup almond breeze (or any kind of milk)
2 tbsp melted butter (or margarine)

Sauce
1 cup brown sugar
1/4 cocoa
1 3/4 cups hot water

3 handfuls mini marshmallows, optional

The methods are very similar. Sift dry non-sauce ingredients. Add liquid non-sauce ingredients (rub in the butter first, in the case of Hasty Pudding, though really you could just melt the butter like brownie pudding if you don't like to get your hands dirty, but that's no fun). Pour the batter into a greased 8-inch square or round cake pan. Sometimes round is more attractive, but this is both a practical decision (you're not going to go buy a square pan if you already have a round one...unless you're thinking of getting rid of your round one and upgrading to a square...if you see it as 'upgrading') and based on individual taste.

Fellow from the Goulds: "Would you like a beer? What kind?" Before I can answer: "How about a Bud Light?"

Bayman: "So you're a Townie? From St. John's? Girl after my own heart, drinking beer. None of those fancy girly drinks. Cocktails and the like. Girl after m' own heart"

The two sauces are what really differentiate the puddings. The Hasty pudding comes out much denser and the sauce is more like toffee, maybe like a sticky toffee pudding but without the cream. The brownie pudding sauce is much easier to make, and it's actually lighter, though it tastes richer from the cocoa. There is no flour to thicken it, and yet it somehow thickens up nicely anyway, defying the odds.

For the Hasty pudding sauce, mix together the flour and brown sugar, then add the butter. It doesn't matter if it doesn't combine properly because the next step is to pour the 2 cups of boiling water over top and melt it all together. The butter will melt whether it's already well-combined with the flour or not. Then add the salt and vanilla. I'm not sure why you add the salt after the boiling water, but I suppose for the same reason vanilla is always added after and not before heat in recipes, to retain the flavour. Then the sauce gets poured over the pudding cake and baked in a preheated 350 degree oven for 30 minutes.

For the brownie pudding, mix together all the sauce ingredients at once, and pour over the batter. Because this recipe only calls for hot water, you could probably get away with just 'hot' water in the hasty recipe too, though there's more in the sauce to dissolve. You certainly don't need boiling water for this one. Waiting for water to boil can be excruciating when it prolongs the chocolate pay-off. Delayed gratification and all. Then into the preheated 350 degree oven for 40-45 minutes.

Fellow from the Goulds: "Do you want another beer?" To the Bayman: "Lets get another beer." I look at my almost full Bud Light and at the almost empty beers of my companions and realize this will not work out well.

There are two options. I can chug the disgusting beer and take another, feigning gratitude. Or I can decline, thereby proving my wimpy Townie nature, disappointing these jolly fellows, and hampering the night's festivities.

I debated, and then I chose option number 3. I would slowly pour all my drinks onto the floor, so I could keep up with the Bayman and the fellow from the Goulds. I'd just pretend the floor was pudding and beer was the sauce. Avoid the shoes, and don't let anybody notice. A game, then.

The most fun part of the brownie pudding is that when it's done you top it with mini marshmallows and "return it to the oven to brown". I stuck it under the broiler to speed up the browning process, being skeptical of the recipe's assured attitude that browning could occur in the lower part of the oven. Impatient me, yet again. Broiling can be tough. You need to pay a lot of attention or your marshmallows will expand and burn, overflowing the top of the pan.

The fellow from the Goulds: "Lets get a shot". To the Bayman: "How about a shot?"
I look at my almost full second beer (having successfully made a pudding cake of the floor with the first 2 minutes before) and at my companions' almost empty beer, and realize this will not work out well.

"Cheers!" Down goes the jager bomb, and out into the beer. Pretend like you're chasing it with the second drink. Unfortunately my beer was a little too full and there was nothing to be done. Also, unfortunately, the beer quickly became a fountain from the additional alcohol. I would have to be more careful for the rest of the night. The best laid plans...

My marshmallows expanded to three times their original volume. I think they would have overflowed like the beer if I hadn't gotten them out right away. They were brown enough, but oh so deliciously gooey on the inside. This needs to be eaten right away, before the marshmallow condenses back down to a normal size, hardens and becomes a bland layer of sugar instead of a smore-like treat. Mmm...heaven.

At 10 minute intervals for the rest of the night:
The fellow from the Goulds: "Do you want another beer?"
"Sure!"

The Bayman: "Can I get you a drink?" I look at my unfinished current drink...
"Sure!"

The fellow from the Goulds: "2 Rum and coke and a beer, please."

The fellow from the Goulds: "A shot. Lets get a shot"
By now I had mastered my shooter into beer spitting technique. Thank goodness.

4am, last call:
The fellow from the Goulds: "You got another few beer behind the bar there? 3 of them.

The question is a tough one: Which is better? The Hasty Pudding or the Brownie Pudding? Pudding origins aside, I certainly preferred the brownie pudding. Somehow I could taste the baking powder in the hasty pudding, though it actually contained less, and it wasn't exactly the flavour I was looking for. Cocoa masks everything in fake-rich liquid cocaine. The dates made the
Hasty pudding sweeter, yes, but the Brownie pudding was much more satisfying. Definitely the Brownie Pudding.

And how did three Newfoundlanders walk out of the bar? Well the fellow from the Goulds and the Bayman were drunk, and the Townie was sober.

Which of these did I choose? Neither. Men aren't pudding.

Tuesday, April 20, 2010

Dairy-Free Vanilla Custard

This dairy-free vanilla custard is not vegan, but I made it with almond milk instead of regular milk or cream. The recipe is about as low-fat as you can make custard while keeping the rich egg yolk flavour. It's a beautiful recipe from Alice Medrich's Chocolate and the Art of Low-Fat Desserts and doubles as a pastry cream for éclairs, cream puffs and trifles. It also works perfectly well on its own. I basically only made this because I had two (should have been four...but it's kind of better this way, since I would have had to quadruple the recipe) egg whites left over after making the Master's Potluck's two chestnut tortes and there's only so much mayonnaise or hollandaise sauce a girl wants or needs. In my case, not much. Custard, on the other hand...

Ingredients:
6 tbsp sugar
8 tsp flour
8 tsp cornstarch
2 whole eggs
2 egg yolks
2 cups milk (almond, soy, cow's)
1 1/2 tsp vanilla

Basically all you do for this recipe is thicken milk and eggs on the stove. The only way to mess it up is to let the eggs scramble, so make sure you whisk while you pour the hot milk over the eggs.

1. Combine the sugar, flour, and cornstarch in a large bowl. Add all the eggs and yolks and beat them for 1-2 minutes. They should be thick and almost white.

2. Scald the milk in a medium saucepan (until the edges just start to bubble a little. It shouldn't boil) and pour it slowly over the egg mixture in a thin stream like olive oil, whisking constantly until all the milk is added. I kept beating with the handheld mixer here because I didn't have enough hands to whisk and pour at the same time. I foresaw the eggs tumbling to the floor that way (you can put a kitchen towel under the bowl to help keep it from moving around of its own accord). The liquid ended up a bit frothy, though, so you kind of need to beat the froth down into the liquid afterward, or you'll have a hard time telling when the mixture has thickened in the next step.

3. Pour the mixture back into the saucepan and cook on medium heat, stirring constantly with a whisk, reaching all over the bottom and sides of pan, until the mixture thickens a lot. When you think it's had enough, keep cooking and whisking an extra 30-45 seconds. Then scrape your custard into a clean bowl and whisk in the vanilla. Cool. Cover. Refrigerate.

Sprinkle with blueberries or raspberries, or chocolate shavings...really, anything that isn't white or yellow (for contrast) to garnish. Serve in individual dishes or one large communal bowl, depending on the circumstances. For the potluck individual dishes didn't make sense, but for a more traditional dinner I'd definitely serve individually. I actually have another custard recipe that I made a few days after this, and it's fun (if you're a custard geek like me) to see the comparison. Hold in there for Buttered Rum-Raisin Cream Pie with a Partridgeberry Glaze.

Chocolate Chestnut Torte with Butterscotch Frosting and Bakeapple Syrup


This recipe is very similar to the Sweet Chestnut Torte, but is much richer and if you accidentally leave out two egg whites like I did, much denser as well. It kind of tastes like a flourless chocolate cake, but is better for you. You would never know it was made with chestnut purée. My mom saw the recipe and liked it better than the sweet chestnut torte, so I decided to make both. Typical indecision.

Ingredients:
4 oz bittersweet or semisweet chocolate, finely chopped (I had about 1 oz of my favourite dark truffle ricemilk chocolate from Terra Nostra and 3 oz of bittersweet baking chocolate. The bittersweet keeps this from becoming ridiculous sugary with the butterscotch frosting, but I think next time I would go half and half)
cocoa
sugar
boiling water
sweetened chestnut purée (again, you can buy unsweetened and sweeten it yourself)
egg yolks
rum (amber or dark. Or brandy or cognac are fine. Or an extract)
vanilla
4 egg whites!! Not two...I got really excited after separating two eggs successfully and forgot to keep going
cream of tartar
1/4 cup flour. Yes, that's all.

Follow the same pan instructions as for the sweet chestnut torte, using parchment paper to line the bottom. This cake also freezes very well and becomes even more ridiculously dense and rich. Do not thaw. Eat frozen.

I spent way too much time fussing over how finely the chocolate was chopped, and everything was just fine when I poured the boiling water over the chocolate, cocoa, and half the sugar. It melted easily enough when I whisked, and I ended up with no clumps of chocolate. I had the same problem adding the chestnut purée as the last cake, though, in that it didn't want to be whisked (off it's feet?). It's supposed to be added along with the egg yolks, rum and vanilla. Cleaning out a sticky whisk multiple times is no fun. If you bang it on the edge of the bowl to get things un-stuck, chocolate flies everywhere. I think a food processor would be a good idea here too, or start mixing with a spoon and then switch to using your hands. If you use your hands right away you'll just end up with a lot of chocolate on them, and make a mess, and waste chocolate. None of these things are good. One is unforgivable.

Then you're supposed to add the flour. I don't know why you can't add it with the chestnut purée, but Medrich is a far better baker than I, so I'll limit my questioning. I combined the other ingredients, and then I added the flour and respected my teacher.

In a medium bowl I beat 2 egg whites with the cream of tartar to soft peaks. Funny, it didn't seem to expand very much...but I added the remaining sugar, up-ed the speed to high and beat to stiff peaks. I folded a scoop of the egg whites into the chocolate mixture and then folded in the remaining whites. Into the pan it all went, where I smoothed it down on top. Then into the preheated oven at 350 for 30 minutes, until there were "a few moist crumbs" clinging to my toothpick inserted in the middle of the cake. Now I was expecting the cake to collapse in the middle. The recipe even says it will. Funny, Medrich didn't warn me in the sweet chestnut torte recipe that that would happen. I thought it had been all my fault. Maybe I'm not as incompetant with egg whites as I thought?

No, I probably am. A moment of revelation. There were supposed to be 4 egg whites...the only reason my cake didn't collapse was because there wasn't enough air in it in the first place. I am still a disappointment to myself and meringue everywhere. At least I made amazing butterscotch frosting...wait, that didn't go perfectly either. I'll blame the joy of cooking for that one, though. Medrich, I will not blame. This one was all me. The dense cake was still delicious, at least. I won't give the butterscotch forsting recipe again here, since it's in the last post, and the only difference with the topping was the addition of a bakeapple syrup instead of a blueberry syrup. Same concept.

Bakeapple Syrup
Well, it kind of came in a bottle...so I just heated it up and drizzled it over the frosted cake. It was a local specialty product, and the tart flavour was a nice break from the rich chocolate. I was happy with it. Even if I made a million mistakes, the Master's Potluck guests were none the wiser. Oh, and it was delicious. So many desserts and so much addictive sugar.

Sweet Chestnut Torte with Butterscotch Frosting and Blueberry Syrup

I brought a can of chestnut purée home from Montreal to Newfoundland along with my sezchuan peppercorns and dried Anaheim, New Mexico and bird's eye chili peppers (these things are still hard to come by here, though at least the peppercorns may soon be available at Food For Thought on Duckworth Street. Ask and ye shall receive) and I was set on using all of them...not all in this one recipe, thank goodness...oh dear.

I mainly wanted to make this recipe because I had tried it in Montreal and failed rather miserably. It involves egg whites and I certainly don't get along with those. Especially from eggs that had frozen a little in my fridge. They didn't want to rise very much and when the cake came out, it immediately deflated. It was a crushing defeat.

It's a beautiful recipe, though, from Alice Medrich's Chocolate and the Art of Low Fat Desserts. The chestnut purée is a traditional French ingredient, incredibly low in calories and with almost zero fat, often served on its own, direct from the can, sweetened, or with a dollop of cream. It is simple, refined and elegant (not if served DIRECTLY from the can to your plate in a restaurant). By adding it to a cake, you cut a lot of the fat and flour since the purée is moist but thick. Kind of like adding applesauce or fruit purées, but a much more savoury and unique flavour that you don't necessarily want to cover up with cocoa powder or chocolate. I did remember from making the cake before that it was still kind of bland, even with a little thick yogurt on the side, so a fruit sauce would do it well. Then I remembered that frostings should be rich and sticky (I rarely forget this) and fruit just wouldn't cut it. So I made a butterscotch frosting from the Joy of Cooking and made a quick blueberry syrup to garnish. Fruit + butterscotch + chestnuts = Heaven. Only problem is that the cake only keeps for 2 days max, but you can put it in the freezer and I kind of find that the freezing makes it deliciously denser and the butterscotch flavours jump out even more. No need to defrost or heat anything.

Sweet Chestnut Torte
1 cup chestnut purée (sweetened purée is what the recipe calls for, but if all you can find is unsweetened, or you prefer, you can just add sugar or a sugar substitute as long as you keep a similar consistency)
2 egg yolks
brandy
vanilla
1/4 cup flour
4 egg whites
cream of tartar
sugar

That's honestly all the ingredients. So simple. This works best with a springform 8-inch pan but any kind of deep cake pan works fine. Line the bottom of the pan with parchment paper. It will make your cake life easier. For your other life, you're on your own.

1. Combine the chestnut purée, egg yolks, brandy and vanilla and then mix in the flour. Yeah, Medrich didn't get around to saying how hard this one little step is...the purée is ridiculously thick that you can't whisk it, but it gets clumpy if you just use a spoon. It's also too thick for a blender, so a food processor or your hands are really your best options. A handheld mixer might almost do, but it might be frustrating.

2. Now the egg whites. Beat them on medium-high speed with the cream of tartar to the ambiguous level of "soft peaks". Then slowly add the sugar and beat at high speed until the egg whites are "stiff but not dry". Hmm...after so many mousses I still feel like a fool. I still am never sure if I do this step correctly...it's not like if you ate the egg whites they would taste like dry goods, but they're certainly not like a fluid anymore. Oh I don't know.

3. Preheat the oven to 350 degrees Fahrenheit

4. Fold a scoop of the egg whites into the chestnuts. Again, HARD! The chestnuts are pretty dense and the whites are not. How are you possibly supposed to keep any air in the whites when they're being suffocated under layers of chestnut cement? I think next time I will sweeten my purée with honey instead of sugar to make it creamier and easier to mix. Maybe the can I bought is more dense than other cans? American cans? No, they're all imported, so who knows why it didn't work as well? I've made my own before but it's a lot of work.

5. Fold in the remaining whites. A little easier now that the first 1/4 is in. Scrape the batter into the pan and use a spatula to smooth down the top. This cake does not rise anymore, so how you put it into the oven is how you hope to take it out.

6. Bake 25 minutes, or until a toothpick comes out with just a few moist crumbs, says Medrich. How many is a few? This was a hard call. Know your oven is all the advice I can offer. Just know you're probably just as uncertain as I was. When the cake is cool, remove it from the pan and peel the parchment paper off the bottom. Then flip it back into the pan to add the icing. If your torte collapses like mine tend to do, there's no need to be careful when you're flipping it over. There is nothing delicate about the egg whites anymore. Like a flower that bloomed and now is on the down-swing. Circle of cake-life and all. It makes me feel better about the results if I think of them as inevitable. Such is life.

This serves 10 people, apparently, with a grand total of 1.5 grams of fat per serving. What kind of cake does that? That's why it needed the icing below:

Butterscotch Frosting
(milk-free, optional vegan recipe)
4 tbsp butter, margarine or vegan margarine
1/2 cup brown sugar
1/8 tsp salt
2/3 cup almond milk (or soy milk, or regular milk, or 1/3 cup evaporated milk)
2-2 1/2 cups powdered sugar
1/2-1 tsp vanilla or rum

First, you need to evaporate your milk. Almond milk does not come in convenient cans like evaporated cow's milk, but it's simple to make. Just heat your 2/3 cup of any type of milk in a saucepan over medium heat until it reduces by half. Almond and soy milk won't curdle like regular milk if you put it at a higher temperature, so really you could bump up the heat to make this go faster if you watch it carefully and stir to make sure it doesn't burn. You want to end up with 1/3 cup.

Then combine the milk with the butter (or margarine), salt and brown sugar in the top of a double boiler. I use a stainless steel bowl set over a pot of boiling water. Just make sure the bottom of your bowl doesn't touch the surface of the water, and only have the water at a simmer, not a rapid boil. You just want to get everything melted and stirred together until it's smooth. This step is beautiful.

Remove the bowl from the heat and let it cool for 5 minutes before beating in 2 cups of powdered sugar and the vanilla. My icing seemed too thin, so I added more powdered sugar until it seemed right. You should actually first set your bowl in a pan of ice water and beat without adding more sugar for awhile, just to see if it isn't thickening because it's still too hot. That way you can maybe save yourself multiple heart attacks from all the sugar in the icing. One is enough, thanks.

I wasn't sure if this was going to be one of those icings that gets grainy and hardens on top. Those are gross. I poured it on the cooled cake right away. It's actually a nice icing, not hardening and all, and even after sitting for a day before it was served, it held up decently. It kind of slid off the cake because it was still a bit runny, but more powdered sugar would have been a bad idea, so I left it at that.

Quick blueberry Syrup
My parents have about 5 open jars of jam and jellies and fruit-based sauces in the fridge that will never be used. So I took the remains of a wild blueberry spread, heated it in the microwave for 20 seconds and drizzled it over the iced cake. It wasn't exactly artful but it looked interesting, and you can't really undo a drizzle anyway. The mildly tart wild blueberry flavour was really good at cutting through the sweetness of the frosting. Mmm...delicious cake.

Kale with Garlic and Lemon


So many people think leafy greens and immediately think "yuk". It's so annoyingly cultural. Italian kids will go for seconds of the wilted spinach or sautéed rapini, and North Americans of all ages will subtly push their serving to the side. I have huge respect for Josée di Stasio for devoting 2 entire pages in her cookbook A la di Stasio to 5 ways to serve "Greens". This includes stir-frying, steaming, blanching, boiling, and combinations of these. My personal favourite right now is to blanch and then sauté. This is so easy and takes all of 10 minutes to prepare, if you get the water boiling while you remove the leaves from the greens

1 bunch of kale (or rapini, or swiss chard, or spinach, etc.)
1 tsp olive oil
1 clove garlic, minced
salt
lemon juice, optional

1. Separate the leaves from the stems of your leafy green of choice
2. Plunge the stems into a large pot of boiling water for 30 seconds, then add the leaves for another 15 seconds. Drain the pot. Seems like a huge waste of water, but you can save it, if you wish, for future boiling, blanching or steaming. Or use it as a base for vegetable broth. Swiss chard is actually very sweet and works well for soup stock, while rapini is more bitter.
3. Heat the oil in a skillet or large pot over medium-high heat and when hot, add the garlic. Cook 2 minutes, stirring, until just starting to brown.
4. Add the leaves and stems of the greens and a sprinkle of salt
5. Cover, reduce the heat to medium, and cook until "tender-crisp" (whatever level of crispness you prefer, but the shorter cooking time the better, since the greens lose their nutrients quickly. It's a fine line, because their nutrients are more easily absorbed if they're cooked, rather than raw, but if they're over-cooked you can't absorb any nutrients at all since they've been destroyed).
6. Serve with a sprinkle of lemon juice if desired. Di Stasio also recommends grated nutmeg. I have yet to try it, but I'm a little excited.

(I skipped writing a post on the recipe for Sea Trout in a Spice Rub that I made for the Masters Potluck because it's the same recipe I made the week before).

Sunday, April 18, 2010

Freak Snow Storm Harira Soup


Yesterday didn't start out badly. Sure, the day before there had been a few flakes of snow, but it was in positive digits. Then all of a sudden I look out the window to see sideways snow whipping through the air. I actually had to get out the snow brush and scrape off the car. Good thing I did, too, because the thing stalled when it spun on the layer of accumulated white stuff, the wheel locked up, and I barely avoided the car in front of me, using my relatively snow-free mirror to figure out how to get me out of harms way.

Anyway, it was a day for soup, both to warm me up and to calm my nerves. Slow-cooker aromatic soup. No-need-to-walk-to-the-grocery-store soup.

Harira
olive oil
2 onions, finely chopped
ground cumin, ginger, turmeric, and black pepper
6 cups chicken broth
fresh coriander (cilantro. They're the same thing)
fresh lemon balm
1 cinnamon stick
1 cup yellow lentils
2 cups cooked chickpeas (no cans for me)
1 can diced tomatoes (well...it's not tomato season)
pitted dates

So I kind of overhauled the recipe because I didn't feel like walking to the grocery store. There was supposed to be a whole bunch of parsley in there, and the recipe certainly didn't call for the lemon balm. It wanted a 1/4 cup of lemon juice instead. It also wanted more cilantro than I had. Oh, and green or brown lentils, instead of my yellow ones. It's soup, though, which is fortunately a very forgiving meal.

I had dried chickpeas, so my first step was to quick soak them and cook them separately from the rest of the soup. To do this you (1) bring a cup of dried chickpeas to a boil in 3 cups of water. When it gets to a boil, you cover it, reduce the heat, and let it simmer for two minutes. Then you remove it from the heat, keeping it covered, and let it sit at room temperature for an hour. Drain the pot after an hour, rinse the chickpeas, and (2) put them back into the rinsed pot with 4 cups of water. Bring the pot to a boil, cover and reduce the heat again, and simmer for 35-40 minutes, or until the chickpeas are tender (not mush, but not too tough. They shouldn't take 30 seconds of chewing to break down in your mouth). Drain the chickpeas and rinse again. All the rinsing removes the starch and makes them easier to digest. The fresh chickpeas (as opposed to using a can) won't have that brine-y smell, so your soup will taste more nutty and less...well, packaged.

You can also just soak the beans in 3 cups of water overnight, then the next day drain and rinse and continue with the second part of the cooking. Also, feel free to double (or triple) the amount of beans you soak and cook, since beans will keep in the freezer for several month (1 month, says the Canadian Living Slowcooker Collection cookbook, at least 3 months, says me and every other source I've seen).

The recipe for Harira attracted me because of its exotic spices. Cinnamon slow-cooked is one of the best things in life. Add to that the fact that I get to garnish soup with dates and I'm sold. I even skipped the tricky part of the recipe that says to make an herb bundle of cilantro, parsley and the cinnamon stick, which worked just fine.

Harira is a soup traditionally served at the end of the day during Ramadan. Muslims fast all day and this meat-free (if you use vegetable broth instead of chicken broth), protein-rich soup is a warm, comforting and affordable way to fill up a hungry person fast. I love practical yet delicious food traditions. It's a nice mix of sweet and savoury; a real treat but full of healthy ingredients.

Instructions:
Sauté onions in oil over medium heat for 5 minutes. Add the ground spices and stir for 1 minute. Now transfer the mixture to the slow-cooker.

Deglaze the skillet with 1 cup of the broth, and scrape the browned spices that are clinging to the pan for dear life into the slowcooker with their aromatic brothers and sisters.

Now you're supposed to chop 1/4 cup of parsley and coriander to use as garnish, and tie the rest into a bouquet garni (herb bundle) with the cinnamon stick, but I never have kitchen string, and ever since Bridget Jones' Diary's blue soup fiasco I dare not risk using any kind of substitute to tie my herbs together. So I just chopped up all the cilantro and lemon balm I had (my mom keeps it frozen from an organic veggie coop in the summer. I don't just 'happen to have' lemon balm...) and chucked it into the slowcooker with the cinnamon stick. Why would I want to remove the herbs at the end anyway? The recipe just says to garnish with more anyway. The cinnamon is easy enough to take out on its own, being a big stick and all. Oh, I also figured not using parsley wasn't the end of the world (though I could have used dried I suppose) since I sometimes think of parsley as a wimpier version of cilantro. It is often called for to substitute the more pungent cilantro in recipe books (including this style of cooking) for people who's taste buds don't like...well, flavour. Yes, the herbs are different, but it's soup and it would all be fine.

Then all I did was add the cup of lentils, the cooked chickpeas, the rest of the broth and a can of tomatoes (diced and with juice) to the slow-cooker. Oh, since my tomatoes were salt-free and my broth was reduced sodium, I added a tiny bit of salt. Crystal salt. Much better for you than boxed sodium, and I only needed a pinch. Really the only way to mess this soup up is to have it under-flavoured, and lentils and chickpeas would need a little salt help to shine.

The slowcooker got turned on low for 8 hours, and when it finished, I poured a bowl and topped it with half a date. Other garnishes include a sprinkle of ground cinnamon and lemon slices, but I hate overly lemon-y soup (Sorry, Greece. The lemon balm worked much better than acidic fresh lemon juice, which should be added after the soup has cooked if you use it, along with the reserved herbs, if you use those too), and I was too hungry for soup to grind a piece of cinnamon stick in the coffee grinder. If it was pre-ground cinnamon from a package, it wouldn't have been worth the effort. Better to just suck on the cinnamon stick in the soup, which partially unfurls during cooking. It also makes a good spoon to scoop up the lentils, beans and tomatoes, and the intoxicating flavour beats any glass of wine to accompany the meal. This soup is such a wonderful Muslim food tradition.

Just one note: definitely, definitely don't skip the date garnish. You need it to contrast with the acid of the tomatoes and the nuttiness of the chickpeas and lentils. Like toasted coconut in Josée di Stasio's lentil soup, it makes the meal go from standard/fine to epiphanal.

It's still snowing...this is ridiculous.

Friday, April 16, 2010

Baked Sweet Potato Fries


I bought 12 sweet potatoes. 1 for each expected potluck guest. I knew it would be way too much, but I did it anyway. Sweet potato fries go fast, and besides, they're SO easy to make. Really, all you need are sweet potatoes, salt and a bit of cayenne. Others would say skip the cayenne and you're golden, but you really need a tiny bit of heat (you won't really taste too much of it) to cut the sweetness of the fries. Never, never, never skip the salt.

I used my family's fall-back spice rub that we use on salmon (coat the fish with dijon and then sprinkle on a bit of the spice mixture. Grill, bake, or pan-fry). It's mostly salt, but the paprika, chili, cayenne, garlic and pepper give this enough flavour without overwhelming conservative eaters/family members.

Ingredients:
1/3 cup salt
1/4 cup paprika
3 tbsp chili powder
2 tbsp black pepper
1 tbsp cumin
1 tbsp garlic powder
1 tbsp cayenne

For the Fries:
3 tbsp olive oil
12 sweet potatoes

1. Cut sweet potatoes into your fry-shape of choice. I prefer long, thin matchsticks because the thinner they are, the faster they'll cook, and the more rub gets on each fry. So cut one slice off the sweet potato lengthwise to give yourself a flat sweet potato surface. Place the big piece cut-side down on the cutting board and slice it thinly. Then re-stack those pieces (except the end piece, which won't be stable) on their side, and cut lengthwise again to give you fry-like pieces. If the potatoes are too long to cut this way, cut them in half lengthwise first, and then continue with the cutting instructions above.

These are just suggestions. You can cut your fries however you want. The only thing to keep in mind is that all the pieces should be the same size approximately, so that they cook at the same speed. It's no fun when you end up with some cooked and some not-cooked fries (you can try to separate them, but it never works, and it wastes a bunch of time when you wish you were eating), or some are perfect and the rest are burnt. So, make similarly sized pieces, however you want to cut them. You can make them like hash browns if you want, but also keep in mind that the thicker they are, the more oil you'll need to use, because they'll be in the oven longer and will burn more easily.

2. Preheat the oven to 425 Fahrenheit.

3. Combine your spices in a small bowl.

4. Pour 1 tablespoon of olive oil over each 5 cups sliced sweet potatoes (you'll need a few big bowls to do this, and the ratio isn't so important. Just pour some oil over your sweet potatoes).

5. Pour half the spice rub over the sweet potatoes (probably don't pour all of it. That would be a lot. Start with half and reserve the rest for another time or another dish)

6. Mix the potatoes, the oil and the spices up with your hands.

7. Place the fries in a single layer on baking sheets. Make sure they don't overlap. They won't cook evenly that way. Place one or two baking sheets (however many will fit) in the oven at a time and bake for 12 minutes. Take the pans out, carefully flip the fries over, rotate the pans if possible, and bake again for about 10 minutes, or until the fries are tender. Eat right away before they cool. Do not leave them sitting in the oven even if the heat is turned off unless you want sweet potato jerky...It's not bad, but it's not sweet potato fries.

Just a quick note: if you don't want to make all the fires at once, you can freeze them after you've oiled and spiced them and then just bake them like you would frozen french fries. They just need to bake a bit longer. They can also hang out in the fridge for a few days un-cooked, until you're ready to bake them.

These are so much better for you than deep-fried sweet potato fries that pop up at every vegetarian and vegan restaurant in the world (not raw places, obviously), and now also at every place that serves a burger (veggie or not). Normally even if they're baked, they use a lot more oil, or they're sautéd first with flour mixed into the spices to give a firmer fry. The fries tend to break down and get mushy, which is why they should be served right away, and definitely not too over-cooked. Such an easy recipe for a crowd, or just for one if you make a small amount for yourself in a toaster oven. Mmm...sweet and spicy.


Arugula Salad with Shrimp and Grapes

Every good potluck needs a salad. A good salad. Not some greens served besides bottles of Kraft dressing. Not something coated in oil. There are two appropriate kinds of potluck green salads - ones with the dressing on the side (where only the unobservant fools who are too in a rush to get the food into their mouths to notice the accompanying vinaigrette miss out) and ones tossed in a dressing that generally everyone can enjoy. That means no cream, no heaps and heaps of mayonnaise, and no 4:1 ratio of oil to vinegar. Green salad at a potluck should not be the least healthy option. I hate feeling like a double serving of meat would be better for me than leafy greens because of some inconsiderate cook/guest. Breathe...

This salad is so light but full of flavour from the sweet grapes and white wine vinegar (you can also make a version using pear, that works in exactly the same way, and just as well). No need to add honey or sugar, and the puréed fruit substantially reduces the amount of oil needed. As always, a good dijon is important, even if you're not as obsessed as I am. I am admittedly not quirk-free, but I know good salad. Trust me.

Ingredients
Vinaigrette:
1/3 cup green grapes
1 tablespoon white wine vinegar
1 teaspoon olive oil
3/4 teaspoon dijon mustard (dijon will be much better than prepared yellow mustard, but use what you must)
1/4 cup basil, roughly chopped or torn
1/2 teaspoon onion, optional (shallots or sweet red onion work well. Yellow onions will be very pungent, but you're the one who'll have onion breath, so it's up to you to decide. If you make the vinaigrette in advance and let the flavours combine for a few hours in the fridge, it won't taste as strongly of onion)
A pinch of salt

Everything else:
3/4 lb shrimp, peeled (optional)
1/2 cup celery, thinly sliced
5 cups arugula (you can make the salad with any green but arugula has a bitterness to it that goes really well with the sweet grapes. Just don't use a crispy lettuce because the salad will seem too watery)
1 cup seedless red grapes, optionally sliced in half
1 cup seedless green grapes, optionally sliced in half
1 tablespoon pine nuts or walnuts

Instructions
1. Blend the vinaigrette ingredients in a blender or food processor. Easiest dressing ever. You could actually just skip the rest of the recipe and serve this with greens (and maybe some halved grapes) right now.
2. Bring 4 cups of water to boil in a large saucepan (if you're not using shrimp, you'll only need a cup and a half of water brought to a boil). Add the shrimp and cook for 1 minute.
3. Add the celery to the boiling water and cook for 1 minute.
4. Drain the shrimp and celery and rinse them with cold water. Pat them dry and add them to the washed arugula in a large salad bowl (the bowl needs to be big enough to toss the salad without having grapes go everywhere. Use a few bowls if you have to).
5. Add the 2 cups of grapes to the salad bowl (you can slice the grapes in half if you want, but it takes awhile. Teeth work just fine).
6. Place the pine nuts or walnuts in a small frying pan (or in the toaster oven on a tray) over medium heat and cook (or bake at about 400 degrees Fahrenheit) for 5 minutes or so, shaking the frying pan occasionally, until the nuts are fragrant and slightly darkened. Add them to the salad bowl.
7. Toss the salad with the vinaigrette.
8. Eat lots of salad.
9. Feel really good about yourself.

Tuesday, April 13, 2010

Masters Potluck

Traditions are wonderful. When my family started having a Christmas party two years ago, I immediately started calling it 'annual'. Traditions need to start somewhere, and they certainly need a little bit of help sometimes. A longer tradition in my family is my dad hosting a potluck to watch the final round of the Master's, which was made more entertaining for non-golf fans this year by the intrigue surrounding Tiger Woods' return. He was in the final round, not too far back, ready to make a run at it. Add a little bit of a wager to the event, as per tradition, along with a lot of alcohol and good company, and you've got yourself a relatively fun golf game. Miracle, I know.

A new tradition, I hope, was my responsibility of supplying a bunch of food for the party. My dad usually does a beef dish and a loaf of bread. He also buys a plate of pastries from a local bakery. I remember the Masters Potluck party from my childhood because it was the only time we ever had cream-filled things in the house. Eclairs, tarts, custards. I would have had no idea what they were without this annual event. So my dad bought the sweet tray and made his bread this year, but left the rest to me. Yes, everyone else was supposed to bring a dish, but usually the host of a potluck is responsible for a meat entrée and some kind of side dish, starch or salad - basically whatever food category is unaccounted for. To me, this is potluck etiquette. I intentionally went whole hog, though, and covered all my bases with the following menu:

Striploin Roast with Wild Mushrooms
Arugula Salad with Shrimp and Grapes
Baked Sweet Potato Fries
Spice-Rubbed Sea Trout
Kale With Garlic and Lemon (there are never enough greens at potlucks)

Sweet Hazelnut Torte with Butterscotch Frosting and Blueberry Syrup
Chocolate Hazelnut Torte with Butterscotch Frosting and Bakeapple Syrup
Vanilla Custard (I needed to do something with the leftover egg yolks from the meringues in the tortes...)
Hasty Pudding
Brownie Pudding

The amount of desserts looks ridiculous, I know. I made them so my mom and I would have something to eat, what with cream not agreeing with us. In addition to a rhubarb sorbet brought from friends at the local organic farm, we had more than enough options. The last two desserts I had made the day before, because my mom and I had talked about brownie pudding and I felt like making it that evening for dessert, but when I looked for the recipe I couldn't decide between the hasty and brownie puddings (the main differences in the recipes were dates in the hasty pudding and cocoa in the brownie pudding sauce. Otherwise they were very similar. I did melt the optional marshmallows on top of the brownie pudding this time, though, which I never used to do when I made this). So I made them both.

It was way over the top for host requirements, but I didn't want there to be a lack of food, and potlucks can be so disappointing, especially if you have dietary restrictions.

I'll start with the meat and work my way down the list:

Striploin Roast with Wild Mushrooms
Ingredients:
dijon
garlic, minced
pepper
Worcestershire sauce
dried rosemary
4lb boneless rib roast
salt
olive oil
shallots, peeled and quartered
balsamic vinegar
dry red wine
wild mushrooms (a mix of shiitake and portobello), cut in half-inch slices
oyster sauce
fresh parsley

Oyster sauce is a weird addition. You wouldn't associate an Asian condiment with a European-style roast, but the sweetness and earthy flavour works well with the dry red wine and balsamic. The recipe even calls for a fair bit of it, so it's not like it's just there to hang out.

This is supposed to be made with a striploin roast but there was 'narn' to be found in my Newfoundland grocery stores. So Bonnie Stern's Heartsmart Cooking said that a boneless rib roast would work just fine. What I bought seemed like the closest thing to a boneless rib roast...actually I had to buy two smaller roasts to get to 4lbs, but I didn't have a choice. That's why it cooked a bit too fast, I'm sure, but I don't eat beef anyway, and you can get away with serving beef medium in Newfoundland sometimes. Blood is often frowned upon here.

The recipe says to combine the mustard, garlic, pepper, Worcestershire sauce and rosemary and to pat it all over the roast. Then let it marinate at room temperature for 30 minutes or in the fridge "for longer". Pick a duration and roll with it. I'm not a big fan of marinating at room temperature and I had lots of time to let the roast sit in the fridge, so I gave it a good 3 hours.

I think I forgot to add the salt...hmm...I don't recall. It's supposed to be sprinkled on just before searing the meat. Too late now, I guess. I heated the oil in a skillet on medium-high and seared the roast on all sides. Not a lot of fat was left in the skillet after I transferred the roast to a baking sheet lined with parchment paper. I have no idea why it's supposed to be lined with parchment paper. Or even why Bonnie Stern calls for a baking sheet. Why not a real roasting pan? Mysteries of life.

Then the roast got stuck in the oven for 45 minutes at 375 degrees Fahrenheit. Now I've recently been making a lot of roast meats, but mostly things that are braised. This recipe didn't say to cover the roast (neither did it specifically say to leave it uncovered) but I'm a bit scared to leave meat uncovered in the oven at a reasonably high heat. Seems like a recipe for disaster (aka a recipe for dry meat). I decided to cover it, which was probably a bad idea since it over-cooked. After 45 minutes I checked with a meat thermometre. It was supposed to read 135 Fahrenheit and it kept going up and up from there. I didn't want to see where it stopped...I hate thermometres. At least now I knew it was okay to leave the meat in the aluminum foil to rest for 20 minutes. The recipe again didn't say anything about covering it, but I thought that was pretty standard? The juices would spread out in the meat, but it might cook a little more from the remaining heat. What to do, what to do? Leave the meat in aluminum and let the juices spread, or remove the aluminum to stop the cooking? I figured I had a better chance with the aluminum on. I'm such a novice.

Then I tried to skim off some of the fat from the baking sheet (this is where my parchment paper confusion comes in. All the juices that accumulated in the pan kept the meat from sticking, so the paper just got covered in blood and juice. Didn't really seem to serve a purpose). So I gave up on the skimming and poured the liquid into the skillet where the roast had seared an hour before. The skillet was set to medium-high again and the shallots and vinegar were added to deglaze the stuck bits.

I was supposed to cook until the vinegar evaporated and the shallots began to brown, but who knows when that is? There was so much juice from the roast that it's impossible to tell when there's any vinegar left. The shallots didn't really want to brown either. I had a time-line going on dinner, so I waited about 10 minutes and figured that had to be enough.
Then the wine. So fun. I used the only dry red we had - a 2006 Clos de Jordanne Pinot Noir...not what I ideally would have liked to use for cooking because it's a pretty nice bottle, and the recipe called for 2 cups of it, but I knew it would make a fantastic sauce, and there'd be enough left to sample on its own after. This liquid got reduced to a 1/2 a cup while I again scraped down the brown bits stuck to the skillet.

Then in went the mushrooms. Some mushrooms don't like the idea of "1/2-inch slices". So my mushroom shapes were a bit abstract. Turns out I was supposed to remove the stems from the shiitakes, which would have made slicing them easier. No heads up on that one from Bonnie, though. Just think of it as mushroom art, and know it will be delicious either way. Much better than Yoko Ono's Orange, anyway.

The mushrooms cooked for 10 more minutes. Finally the oyster sauce was added and cooked for 5 minutes. Oysters and mushrooms. That makes sense to me now.

The parsley got added to the sauce, the roast got sliced and the sauce got poured on top. I wish I'd stopped pouring about halfway through. There was way too much sauce for the roast. Basically the roast ended up hiding under the shallots. I think a big problem was that the recipe had said to cut the shallots into quarters. Quarters lengthwise? Or in half lengthwise and then in half width-wise? Next time I will go for quarters lengthwise, because my shallots seemed a bit too chunky, even after I'd coaxed the layers out of them in the skillet. The beef should be the highlight of this, not the shallots. I could also just use half as many shallots, and then I'd have an extra glass of wine to share!!

Still, the roast was very much enjoyed, and most of the meat disappeared. It seemed like there was a lot leftover but it was mostly shallots and sauce. The guests knew what they were after.

For someone who doesn't eat beef, I think I did okay. Next time I will mess up less. Definitely a good mantra...

Spiced Basmati Rice: Masaledar Basmati

I know, I know. This is my third rice post in a short period of time, but if you want something just a touch fancier than a plain basmati rice, this is a nice, easy recipe.

2 cups basmati rice
water
2 tsp oil
1 onion, diced
1 clove garlic, finely chopped
1/2 tsp garam masala
a pinch of salt
2 2/3 cups chicken broth
1/2 green chili, finely chopped optional)

Rinse the rice 5 times. Cover it with twice as much water and leave it to soak for 30 minutes. Then drain it into a strainer and leave it to dry for another 20 minutes.

Heat the oil over medium-high heat (I actually thought to use the leftover vegetable oil!! It was a miracle) and add the onion. Stir for a few minutes until the onion has softened, then add everything else but the chicken stock. Stir the rice grains pretty quickly for 2 minutes to coat them in the spices and oil, but keep them from burning. I added a bit of stock to un-stick the grains when they didn't feel like cooperating, and turned the heat down a little.

Add the chicken stock, bring the pot to a boil, then cover it and reduce the heat to "very, very low" for 25 minutes.

Simple. I'm always worried the bottom of the rice will burn, so I actually turned the heat off the rice a few minutes early, but left the pot sitting on the burner. It worked. I suppose it was a little bit of a rice miracle.

The spices are mild enough that you can still serve this with a highly flavoured or saucy meat or vegetable dish, but it's nice to have the colour and see the extra ground spices. It's also nice to have a bit of variety in your rice-eating. Plain basmati is lovely, but onions, spices and broth are a real treat.

It was perfect with the best dish I ever made - almond poppy seed leg of lamb with figs.

The Best Recipe I Ever Made: Almond, Poppy Seed, and Fig Shahjahani Leg of Lamb

I can never try opium. This is not a problem or anything, but I just know that I can't try it or I'll become addicted. If I can become addicted to the toasted poppy seeds in this recipe this easily (which are not addictive at all, but are derived from the same plant as opium), then there's no hope for me with the harder drug. If I were Jewish I think I'd have no choice but to become an addict. So much hamantash and rugelach. Purim would, ironically, be like a personal request for me to sin.

I'd never made a leg of lamb before, and since it was the week after Easter, I figured there would be lamb on sale, the kind that needed to be sold after not enough Christians, Greek Orthodox, and Jews had bought whole legs in Newfoundland (there were, however huge sales on hams...). I kind of forgot that there's no such thing as fresh lamb legs in Newfoundland, so neither were there any specials on the 4 frozen ones in the whole province. Still, I'd found a leg of lamb recipe in Madhur Jaffrey's Indian Cooking that is traditionally made for Muslim banquets, and I really wanted to make some thing elaborate and special. I was looking for something glamourous in the Indian food repertoire, something reserved for special occasions. I found my pot of gold.

This is actually the best 'meal', 'dish', 'recipe', etc. that I've ever made, and I don't say that lightly. This wins. Simple as that.

The dish is composed of one huge leg of lamb that's marinated for 48 hours in a yogurt, onion, and spice blend (I used almond breeze, which makes the marinade a fair bit soupier, but works well with the other almonds in the recipe), and then slow-cooked in the oven for more than 3 hours.

There are 2 things that make the dish amazing:

1. Toasted ground almonds and poppy seeds are used to thicken the sauce. No butter or flour.
2. Dried figs are placed in the roasting pan halfway through the roasting time, and they absorb the lamb juice and oil, so when the dish is done the figs burst in your mouth, like they were made confit, or drowned in honey syrup. There's just nothing like it. The juicy sweetness of the resuscitated figs, the nutty flavour of the almonds and the incredible flavour of the poppy seeds make this...well, I have no words. Yes, I(!) have no words.

Ingredients
One huge leg of lamb
1 container of Almond Breeze (or 1 1/2 cartons of plain yogurt)
2 1/2 medium onions
7 cloves of garlic
A 7-inch piece of ginger!
5 teaspoons of salt (it's a lot of meat to season)!
1 tsp cayenne pepper
1 tbsp garam masala
1 1/4 cup blanched almonds
16 dried figs
Lots of vegetable oil, or another bland oil that can take high heat
6 tablespoons white poppy seeds (I didn't have white, but the only difference is apparently the resulting colour of the dish)

I took a huge metal baking dish for the lamb and poured in the almond breeze, then I took 4 tbsp of it out of the dish and put it into the blender along with one coarsely chopped onion, the garlic, ginger, salt, cayenne, and garam masala. This spice blend was then added back to the rest of the almond breeze in the dish and mixed together. It's supposed to be creamy and thick from a fairly high-fat yogurt, but this worked just fine, and in the end it left more sauce to scoop on top of the meat, since the yogurt would cook more and disappear.

Then I removed the "parchment-like" outer skin and the excess fat from the leg of lamb. I had no idea what Jaffrey meant by parchment-like skin until I started removing fat. There is this transparent film that comes off, so I tried to remove as much of that as I could without driving myself insane. I wanted to get as much of the fat off as possible, since it's hard to strain the fat off the sauce once the almonds and poppy seeds have been added to the sauce later in the recipe, and there's so much fat in the leg itself that any I could see on the outside would just be unnecessary. This was not going to be a dry leg of lamb no matter how much fat I cut off.

Then the leg got stabbed deeply all over and covered in the marinade. I opened up the wounds and tried to get the almond breeze inside as much as possible. Then the whole leg was covered with plastic wrap and put into the fridge for 2 whole days. I had grand plans to rotate the leg on the second day, so the upper side of the lamb was as marinated as the bottom, but that plan didn't come to fruition. I can't imagine the lamb being more tender, though, so either I don't know what I'm missing or it wasn't a big deal. Sweet willful ignorance.

So on the first day, the leg rested, and on the second day the oven got preheated to 350F. The baking dish was placed on a stove burner and the marinade was brought to a simmer. I was surprised how quickly this happened, actually. I thought it would take an age to heat all that milk, but soon enough the marinade was heated through. So I tightly wrapped the lamb in aluminum foil and stuck it in the oven for the first 1 1/2 hours.

Now the grinding began. I love my father's coffee grinder. Grinders cost $10-$20 and they're one of the best investments you can make for Indian cooking. Sure, a mortar and pestle is great, but it takes a long time and a huge mortar to grind 1 1/4 cups of almonds. Sure, a blender will work, but it often gets stuck, and then you end up with pieces of rubber spatula in your almonds after trying to press them down toward the blades. A food processor works but it's a pain to clean and it seems like overkill. The only other decent option is the food processor attachment for an emulsion blender (I think that's the name of it - the hand blender that looks like a big rod that you stick directly into big pots of soup to purée). The attachment is usually the right size for grinding a cup of something, like almonds.

Anyway, frying pan over medium heat. Add almonds. Stir every now and then until almonds release aroma and are slightly browned. Grind. The toasting is completely essential. The flavour of un-toasted almonds is nothing, but toasting them is another story entirely. After 1 1/2 hours of lamb-roasting, I removed the dish from the oven and added the ground almonds to the sauce. Now is the part where I had no idea of the importance of my actions. I scattered the dried figs around the leg. The recipe didn't say anything about stirring them into the sauce, so I just scattered as I was told, re-wrapped the leg in the foil and put the whole thing back in the oven for another 1 1/2 hours. I had no idea how incredible the result of the simple act of sprinkling dried figs into a lamb sauce would be. Who knew? Apparently all of India. Also, Vietnam, according to the incredible Book of Salt (a fiction book, not recipe book). Oh, I also turned the lamb leg over in the pan so the dryer top would have a chance to be submerged in the liquid and be more moist. The recipe didn't tell me to do this, but it seemed like a good idea.

Now the poppy seeds got toasted. Same formula as the almonds. Frying pan, medium heat. Add poppy seeds. Stir from time to time until seeds are slightly darker (only problem here was my seeds were already dark, so I waited for some kind of aroma and figured that it should certainly not cook for more than 5 minutes). I have a theory about the next part of the recipe, but I could be completely wrong. Jaffrey says to let the seeds cool before grinding them, but there was no "let cool" instruction for the almonds before. Apparently almonds can be ground hot. My guess is that the poppy seeds are already finer, so getting them into the spice grinder without spilling them everywhere is hard. Add to this difficulty a hot frying pan and you have a recipe for a burning. So Jaffrey's trying to save the hands of amateur Indian cooks everywhere, I think.

Now fried onions. Someone told me once that fried onions were the best part of biryani, an elaborate rice dish with saffron and yogurt that always seems dry to me. The onions really do pop, though, and this from someone who absolutely hates fast food onion rings. They're not caramelized, so they're not sweet, but they're not raw, so they're not bitter either. They're a delicacy and a garnish in Indian cooking. So I deep fry-ed.

A large plate got lined with a bunch of paper towels and I added a 1/4-inch of vegetable oil to my frying pan set to medium-high heat. When it got hot (I've never heated so much oil before in a frying pan, so I didn't know how long the 'getting hot' process would take. Tossing a bit of water on the oil and seeing if it popped worked well) I added the two other onions which I'd cut in very, very fine rings. Slivers, really. Then the onions are stirred and cooked until they start to brown...but they didn't brown very evenly, and "start to" is a very ambiguous term. The onions that escaped the oil by trying to climb up the sides of the frying pan got brown, but I didn't think that counted. They certainly didn't "brown at the edges" like Jaffrey said they would. So after about 5 minutes I continued with the next step of turning the heat to medium. Again the onions were supposed to get reddish brown and crisp. Maybe I used too much oil? Kind of seemed like if the onions were exposed more on the top they would have browned and crisped up, since that was exactly my downfall with duck confit. Oh well. I removed the onions with a slotted spoon to the paper towels, where some of the oil was pressed out of them. So now I have a cup and a half of re-usable vegetable oil (flavoured with onion) sitting in my parents' fridge, 3 cups of re-usable duck fat sitting in my brother's freezer, and zero re-usable anything fat in my own apartment. I can basically guarantee that I would be the only one to actually think to use these stored fats. Oh I hate kitchen waste. If only I deep-fried more things I could use up the vegetable oil here...Some things just aren't worth it.

After the second 1 1/2 hours the lamb again was removed from the oven and the poppy seeds and drained onions were added to the sauce. The onions were supposed to be crumbled into the sauce (since they were so crisp), but the translucent slivers were just tossed in reluctantly. Then the lamb got basted with the sauce a little, re-wrapped again, and put back in the oven for another 10 minutes to let the sauce combine.

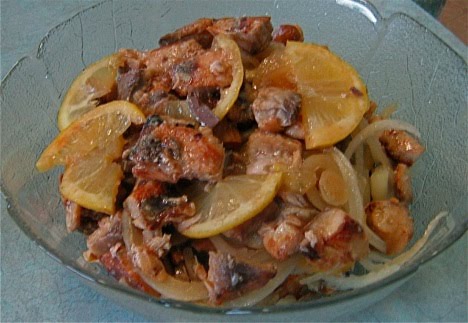
I can't believe I didn't take a picture. I am kicking myself. The lamb is served by removing the meat from the baking dish to a serving platter with a lip, digging the figs out of the sauce and arranging them around the meat, removing any fat from the sauce (this is impossible because of the ground poppy seeds and almonds getting in the way), and then ladling the sauce (or some of the sauce, since it's a lot and will probably overflow the platter) around the lamb. Yogurt would have given a much richer, creamier sauce, but I can't even complain. The almond breeze made it a different, but more saucy dish, which I generally prefer. The lamb was even still medium rare in some places after 3 hours! It was perfect! The top part that hadn't received as much of the liquid in marinating (since "on the first day it rested", instead of being rotated) was a little more 'medium'. The leg wasn't much to look at since the outside isn't seared, there's no golden colour, and the whiteness of the almond breeze makes it look kind of slimy. The blackness of the poppy seeds, however, makes it look kind of speckled. There is no creature in nature to which this roast resembles...but oh, it was good.

Sweet and a little salty. Savoury, creamy and rich. Thick, but textured. A bed of spiced basmati rice soaked up the incredible sauce. The figs. I had no idea figs could cook like that. With the rich lamb, they were...

I could die from joy from this dish. If someone made this for me I would melt, just like the lamb on my tongue. It's a miraculous recipe...well, no, it's an amazing recipe that's taken centuries to perfect. Indian culinary history is incredible...everyone should be lucky enough to eat this lamb, and the beautiful thing is that anyone can make it.