Friday, October 8, 2010

Another Chili Sauce ('Rooster' Style Sriracha Sauce), But This Time With Mold...Trust Me

THAT was a whole lot of slicing. The recipe didn't say anything about taking the seeds out, but I'm not into chilies for the pain; I'm in it for the flavour, so I stripped those seeds out, piece by piece. It took an age and I think a day later I still had chili pepper on my hands (as evidenced by my burning contact lens), but I'm SO excited about this chili sauce that I don't care.

I went back to my chili guy at the Mile End Market and bought another big bag. This time, I was going to do a fermented paste. No processing the cans afterward, just a bit of mold. Since my obsession with sourdough bread and my new-found love of making dosa, I'm a huge fan of 'things fermented'. So I went back to the VietWorldKitchen blog and made myself a Sriracha-style chili sauce (she gives two recipes - fresh and fermented - and I obviously went with the mold. It's kind of a stronger flavour, apparently, and I wanted something unique in my world of heat. That's the kind you see in Vietnamese, Thai and Chinese restaurants everywhere in North America. Often called "rooster sauce", it's the one in the big plastic bottle with the green top. Well, that's not really fair. There are all different kinds with slight variations in heat, sweetness, saltiness, and most importantly, preservatives, and THAT'S why the author of VietWorldKitchen made her own. I'm just following in her well respected, preservative-reduced footsteps.

Oh, she writes a lot about the different chilies to use, but I say use whatever you can find (long red types preferably) and then adjust sweetness, sourness, and salt as you go.

The instructions are great, unless you're me. If you're me you forget not to add the vinegar to the blender mixture in step one. This seriously impedes the fermenting process. So I had to wash everything out of my chilies and dump it back in the blender. Thank goodness I hadn't turned the blender on when I noticed how stupid I was being. Kind of hard to get the liquid out a puréed thing, but it's easy to rinse sliced chili peppers. Unfortunately, on the second try I think I forgot to add more salt. I remembered the sugar (since I did a white sugar/molasses combo instead of brown sugar or traditional palm sugar) but by the time I realized I may have forgotten the salt, it was two days later and I wasn't even sure. Oh well. It fermented, anyway, so I figure that's a good sign. I stuck it in the oven with the light on and it actually overflowed on day 3 of 4. How does that happen? It says leave it at 'room temperature" but Montreal got cold all of a sudden and nothing in my kitchen was ripening (see the dates in the chili sauce pictures. Still as hard as ever. They went a bit moldy too! THAT was not supposed to happen...only the chili sauce was supposed to get moldy).
So then I forgot to add the vinegar when I boiled the paste after scraping off the mold! Seriously, what's wrong with me? So I boiled it again. Fortunately, I figured I'd already added too much water to blend it in the first place (not in the recipe), so boiling off a bit of the extra was fine. Basically I was working really hard to mess this up.
Then I forgot to add more water to purée and had a heck of a time trying to get the sauce through the sieve.  
Finally, it was done. I still haven't tested it for salt. I had some of the leftover pulp with my dinner as a kind of hot sauce since it seemed like such a waste to just throw out all that beautiful chili flesh. I think my heart pounded for about 3 hours from the heat effects, and my stomach burned, but my soul rejoiced.

It keeps for a month in the fridge, so I best get on that.

Thursday, October 7, 2010

The Triumphant Return of the "Free Gazette" Man!

"Have a Gazette! Wipe your windows!"

I smiled. He was back...

"Make fire!"

...and in fine form, it seemed,

which reminds me that it's Hallowe'en, which in turn means that I should be canning every last fruit and vegetable that I can get my hands on before Montreal goes sub-zero. Red and green tomatoes? Check. Chili peppers? Check. Fig, vanilla bean, and amaretto jam? Well, I meant to, but then I ate all the figs. Oops. 

Canned Tomatoes
Here are better instructions than I could ever give, with better pictures than I am currently capable of taking. This blog, Food In Jars, was suggested to me at the Concordia Sustainability Fair by "two canning wizardesses" who have not called me to can, as they said they would. I am only slightly disappointed. I managed on my own. Women are fickle, it seems. To be honest, if they called me tomorrow I'd still can with them. Does that make me sound desperate?

Anyway, the recipe is clear and simple. My only suggestion is that you really only need to blanch the tomatoes for one minute at most, as long as they're fully immersed in the water (ou may need to turn them over at the 30 second mark to ensure even blanching. Use tongs, not your fingers). 2 minutes of blanching and they start to cook, which really isn't a bad thing, but in general, the less-cooked the better. You're probably going to cook them in whatever recipe you use them for anyway, so save as much freshness now as you can. 

I used a mix of red and green tomatoes, mostly for aesthetics. The jars look cool (see the little bits of green in some of the jars?). The green tomatoes are a little more watery, though, so consider breaking them apart a little and draining them through a fine mesh sieve after blanching before stuffing them in the jars. The greens and are also a little more sour, so you may need to adjust for sweetness in whatever recipe you end up making. Make sure you process for 85 minutes after stuffing and safely sealing the cans. The lemon juice thing takes a little bit of calculation, but whip out that pencil and paper and remember how to cross multiply and you'll be fine. x = ?

It's genetic, I'm sorry.

Tuesday, October 5, 2010

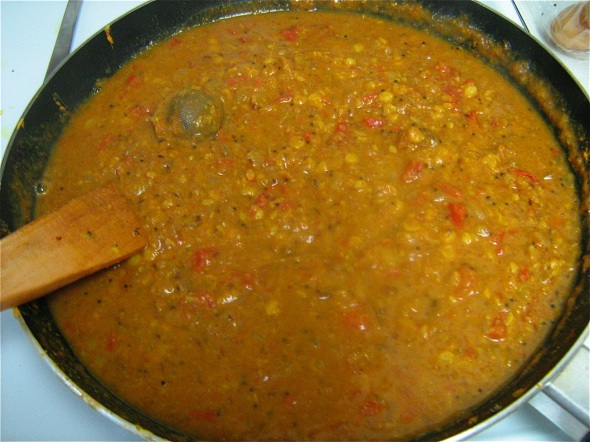
South Indian Sambar: Tamarind, Lentils and Spices

I love making recipes when I don't need to go buy any ingredients. It's only kind of fair because I happen to have a lot of weird ingredients that normal people don't usually stock in their kitchens (chana dal, asafoetida, curry leaves, and even soaked and sieved tamarind in my freezer), but this recipe is exactly why I love Indian cooking - you take a ton of spices, cook them according to a formula and end up enjoying food you were maybe a bit skeptical about trying in the first place. Oh, and your kitchen smells amazing.

Ingredients:
Sambar Powder:
1 tbsp coriander seeds
1 tsp chana dal (like split yellow peas, but not exactly the same. Any split pea substitution is fine, but it won't be exactly the same)
1/2 tsp urad dal (look in South Asian stores and have some good conversations like I did)
1 tsp cumin seeds
1/2 tsp asafetida, grated (this stuff smells like onion...sort of...it's sticky and gets all over your hands, but it's so good for digestion and is everywhere in South Indian cooking)
2-4 dried red chillis
1/4 tsp black pepper
1/4 tsp mustard seeds
1/4 tsp fenugreek seeds (called 'methi', these are little yellow pebbles)
Sambar:
1 cup toor dal. Okay, this is the one place I cheated. I just gone on two major trips in search of urad dal and chana dal and not looked for toor dal. Apparently nothing can replace toor dal in sambar, says the internet, but screw the internet. I used chana dal...it was nutty and delicious and nothing like other sambars I've had, but I'm okay with that. The next time I stumble upon toor dal I'll buy it.

1 lime-sized chunk of tamarind
2 medium onions, chopped
2 medium tomatoes, chopped
1 curry leaf sprig. Yeah trying finding fresh ones...that's maybe a losing battle in Montreal, but dried can be found fairly easily. Cross your fingers and hope they're fresh. Me, I just had a bunch of sort of crushed old ones so I stuck them in a tea infuser (you don't want to eat these guys) and tossed them into the sambar.

1 tbsp chopped coriander leaves
1 tsp salt 
3-4 cups water

Seasoning:
1 tsp oil, 1 tsp ghee (or two tsp oil)
1 tsp mustard seeds  
1 tsp cumin seeds
1 pinch asafoetida (grated and then pinched, presumably)
1/4 tsp turmeric powder

Instructions:
Put the sambar powder ingredients in a small frying pan on medium-low heat. When you can smell them and they start to darken a little, take them off the heat and grind them to a fine powder in a mortar and pestle, blender or food processor. All these spices should be whole, but if you have, say, ground cumin instead of whole, and you're stubborn about not buying the whole ones you can add the ground ones after you've toasted the whole ones before you crush everything together. The ground spices will burn if you add them to an oil-free frying pan with the others. Oh, and it's maybe a bit strange that you wouldn't cook the chana dal for the sambar powder, but that's pretty normal for rice and lentils in South Indian dishes)
Soak the tamarind in warm water (very warm, but not boiling) for 15 minutes. Then take a fine-mesh sieve placed over a bowl and press the soaked tamarind lump through as much as you can. It's a real pain, it's true, but you want to get as much of the softened pulp through the mesh as possible. Throw out the hard material that's left, then add enough water to the pulp to give you 1 cup. 
"Cook the toor dal in 2 cups of water until it's soft". I hate ambiguous instructions like that, especially with lentils that get mushy if over-cooked and chewy if under-cooked, AND every lentil is different, so mine took about 25 minutes, but if I'd actually used toor dal, who knows how long it would have taken. Probably I could have looked it up really easily...I'm up there with people who are too stubborn to buy whole spices, apparently. I'm such a hypocrite. Anyway, bring the water to a boil (after rinsing the dal in cold water a few times to remove any dirt or stones) and add the dal. Bring to a boil, reduce heat to medium or medium-low and simmer for who knows how long...

In a large pot, heat the oil (and ghee). My favourite part: add the mustard and cumin seeds. It'll take them about 30 seconds to start to pop. When they stop, add the asafetida and turmeric powder, curry leaves, and chopped onions. Cook 5 minutes. Add tomatoes. Cook 5 minutes. Add 1 cup water. Add ground sambar powder. Boil. Inhale. Smile. Exhale.
 Mash the cooked toor dal (with a masher, a large, blunt object, or in a food processor. A blender will suck. It probably won't blend well unless you use something intense like a VitaMix. Add the dal to the spiced tomato mixture in the large pot.
 Boil for another 5 minutes. Add the tamarind pulp and salt. Stir and add more water if needed (it should be more like a soup than a stew, but the flavour gets watered down pretty quickly, so be careful, especially if you didn't work that hard at pushing the tamarind through the sieve). Boil for yet another 5 minutes.
Turn off the heat, cover, and prepare dosa or idli, or get the rice that you started cooking 25 minutes ago (you did, right? I sure didn't...). When you're ready to serve, top the sambar with chopped coriander leaves. Normally every person at the meal would get a small bowl of sambar so you can garnish each individually, or give up from exhaustion and just throw all the coriander in to the hot soup to lose its colour and some of its flavour and nutritional clout  : )

This is perfect to make with dosa because they take no time at all. Rice can be made in advance, but idli seem as though they may be a nuisance. I'll try that sometime and let you know.

Sunday, October 3, 2010

Mysore Masala Dosa

This was the first time I ever "winged it" with an Indian recipe. I mean, it's not as though I threw the recipe out the window, but there was nothing that said "30 seconds later add the" or "2 minutes later combine the", as Madhur Jaffrey is prone to do in my favourite Indian cookbook. Actually the cookbook of hers that I have doesn't have many South Indian dishes. So I turned to the internet with its sketchy, and often missing, instructions for a recipe for mysore masala dosa - my favourite fermented rice and lentil crepe known for its slightly (to not-so-slightly) spicy potato filling.

Ingredients
3 cups boiled and slightly mashed potatoes
2 cups chopped onions
1/2 cup boiled peas (not really optional, but I didn't have any, so for me it was optional. For you, well, you can do what you want)
3-4 finely chopped green chilies (I only had red. Well, oops, but that's what I'd bought in bulk at the farmers' market, so that's what I used)
1/4 inch piece of ginger, finely minced
2 cloves of garlic, crushed or minced
3 tbsp oil
1 tsp mustard seeds
1 pinch asafoetida
4-5 curry leaves
salt to taste
1 tsp turmeric 
1 tsp cumin 
chopped coriander
1/2 cup grated fresh coconut (again, not really optional, but the fresh coconut options around the city are minimal, and I'm just one person anyway, and that's a lot of coconut to eat. So I kept my carbon footprint relatively in check...or at least let it balance with my purchase of Greek figs. So worth it).

See, there were no actual instructions on how all these things should be put together, but with some other dosa cross referencing, I got the general idea. Besides, you'd rarely see an Indian cook with a recipe...but that Indian cook would probably have grown up in a household where such things as recipes were passed down from mouth-to-mouth, so to speak.

Directions:
Boil the potatoes. Boil them whole if you've got the time, since they slip easily out of their jackets and I think retain more of their nutrients if boiled with the skins on. If you don't have time, peel them and chop them into smaller sections. When a fork goes into them easily, remove them from the pot and either plunge into ice water to cool, or let them cool on their own while you're busy doing other things...

...such as chopping the chilies. I like to take the seeds out before I chop the chilies, since the seeds give pure heat and no flavour, but if you want that burning sensation to come quicker and don't care about the heat, leave them in and save yourself the trouble. Get all the other ingredients ready and measured. This goes pretty fast, so unless you are a chopping superstar whose spices are all alphabetically organized, be humble and do the mise-en-place. Oh! That includes peeling and mashing the potatoes. You CAN mash them after you've thrown them into the frying pan later, but it takes extra time and thing may burn while you're attempting to mash. Then if you're like me you know they're not going to want to mash and you'll start swearing at it and cursing your lack of a decent potato masher, when a slotted spoon would have been just fine if you'd actually mashed the potatoes before you'd turned on the heat...but that's just me. You are much smarter than that. Anyway, mashing roughly is fine. I kind of like the lumps because potato purée dosa has a less interesting, more baby-food-like texture.

Okay, go! The oil goes in the large frying pan on medium-high heat. When it's hot, add the mustard seeds and asafoetida. Wait 30 seconds. With mustard seeds you always wait 30 seconds, well approximately. You wait for them to "pop" and in every recipe that apparently takes 30 seconds. Mine didn't pop...so I cried a little inside and turned up the heat. Maybe my pan wasn't ready yet. 
Then add the ginger, garlic, chilies, and curry leaves and stir relatively frantically so it doesn't burn. 
When everything is getting a little softened and brown a few minutes alter add the turmeric, cumin and coriander. Now you really need to stir since the dry spices will burn very easily. When it's stirred (it doesn't need to cook more than a minute) add the potatoes (pre-mashed!) and stir everything. The potatoes should turn yellow-orange from the turmeric. The oil will get sucked up, as though through a straw, into the potatoes and your masala is done. You can add a little water to thin it and make the potatoes a little more tender if they're a variety that's naturally starchy. Oh! Salt to taste! Very important! There's no other salt in this recipe and the salt really brings it together, so be generous. Garnish with chopped coriander (cilantro) and wrap in dosa. Die from joy from eating so luxuriously, simply, and healthy. Okay, maybe don't die, but experience some kind of blissful state. Please.

Friday, October 1, 2010

South Indian Dosa

The South Indian Crepe. It looks a bit like a doily, I know. After about 4 days of mostly eating dosa I think I got okay at the technique.

My first try looked like this:
Not bad, but not the beautiful lattice work that I like. I experimented with making it thinner, sometimes ending up with gaping holes that needed to be filled in:
but it was crisp and chewy. It's supposed to be bendy, and be able to fold around its fillings but mine never got that way, even 12 or so dosai later. Maybe my heat was too much, or I didn't use enough oil, or the batter was too thick, or too thin...Well, I'll keep trying. Since I'm allowed to eat with both hands (and/or utensils), it didn't really matter that the dosa was so un-bendy.

It's really simple to make. It's just slightly fermented long-grain rice and lentils. Here's what you do:

3 cups long-grain rice (basmati is perfect)
1 cup skinless split urad daal (skinless black gram)
3/4 tsp fenugreek seeds
Salt to taste (a sprinkle or 1/4 tsp.)
Oil of choice

So it's maybe hard to find split urad daal. I went to a place in Pointe Ste-Charles (the equivalent of the Goulds in Newfoundland...kind of) and said I was making dosa and the man gave me a bag of dal. I said, "This is for dosa?" (This was before I actually had looked at a recipe), and he said "yes." Don't trust a man when it comes to Indian food.

It was chana dal, which was fine, because I can make daal (the soup. The spellings of all these things are a bit ambiguous) out of that, and I used it as a tuvar dal replacement in the sambhar (recipe to come). Different flavour, but I like the nuttiness. Anyway, so then I went to Parc Extension and asked a female store clerk where the split urad dal was. "Skinless or not?" she asked. "Skinless, " I said. She pointed me to an unmarked bag around the corner. What's up with not labeling bags? She lined up her hands vertically as she shook her head. Oh! The one next to it! Another unmarked bag that was just a tiny bit lighter but otherwise identical. Yes, that one, she nodded.

"Why do you know about urad dal?". Not "how", but "why", she had asked. I'm assuming she just used the wrong word, but the verbal slip was interesting. It made it seem as though urad dal is something I'm not allowed to know about, as if it's a secret.

"I'm making dosa," I said simply. "I like South Indian cooking". I smiled, thanked her, and left. I like to think that she shared a secret with me.

Directions:
You need to make this the night before or start VERY early in the morning. The nice thing is, you don't need to make it all at once, since it just keeps fermenting on day 2 and 3. I'm not sure how long it's okay to let it keep going, but I felt comfortable using it up to day 4.

Wash the rice and dal in several changes of cold water, swirling the grains around with your fingers like you would for perfect rice.  Drain it and add the fenugreek seeds. Add enough water to cover the rice and dal by about 2 inches. Soak overnight, or about 8 hours.

The next morning, drain all the water again. Put the rice and dal mixture in the blender or food processor, in batches if necessary, and grind to a grainy paste. You can add a little water if you need to.

Put the ground mixture back into the bowl you used to soak it and add enough water to make a batter. Mine was initially pretty thick, so don't be afraid to thin it out. It should coat a spoon thickly, but you're going to spread this very thin, so remember that it's a crepe not a pancake.

Add the salt and then put the batter in a warm, dark spot, covered, for 6-8 hours. I put it in the oven with the door open on lowest heat. I would have normally just put it in with the light on, the oven turned off and the door closed but for the "dark spot" rule.
Now the batter's ready. Stir.

Get about 1/4 cup of oil ready in a bowl with a basting brush at hand, and take a paper towel dipped lightly in oil and spread it over the bottom of a large frying pan. The oil should be barely visible.
Turn the heat to medium and let it warm up. When hot, take a 3/4 full ladle of batter and pour it in the middle of the frying pan. Now sweep the dosa in ever-expanding circular motions with the bottom of the ladle (plastic if the pan is nonstick!) until the dosa is about 8 inches (the size of a small cake pan) in diametre. Tiny holes are normal and just fine. Some kinds of dosa have them and some don't. It's personal taste and what kind of filling you have that determines if this matters.

Once the batter is spread, immediately dip the basting brush liberally in the oil and drizzle it all over the surface of the dosa and also around its edges. Now hold the pan by its handle, lift up and swirl it to make the drizzled oil spread all over the dosa. Careful not to swirl the dosa right off the pan like I did the first (few) time(s).
After a few minutes check the bottom of the dosa. It should be light brown. The first dosa sometimes isn't evenly browned, but don't worry. Years of pancake-making taught me this is fine, and the second batch will be more consistent. Flip the dosa. Cook 1 more minute, or until the bottom is lightly browned. I don't like it soft and chewy, so I made sure it really got enough cooking time, but I think I overdid it because then you're supposed to fold the dosa in half and let it cook 30 seconds more. This is probably an important step I skipped...

You can eat dosa plain, or with coconut chutney. Since I'd have to buy a whole coconut to get a decently sweet-tasting chutney, I skipped it and just went with hot sauce. Very non-traditional. The second dosa was ready at the same time as my potato masala filling (recipe to come), though, so that one got all wrapped up burrito-style...well, cracked burrito-style. Still, delicious burrito-style. The next day I added sambhar. That was when everything in my world got a lot sunnier.

To make the second dosa you need to run a paper towel under some ice cold water and rub it over the pan to remove any dosa debris and cool the surface. Apparently this makes your dosa not break as easily since the pan is cooler. Then proceed as before with a little more oil on a paper towel and 3/4 of a ladle of batter. So easy. 5 ingredients. Go forth.


Thursday, September 30, 2010

My First Jam: Figs!

So maybe the title sounds a bit like a kid's story book ("My First Tooth"? I never read those...) but you could have given me a quarter and I couldn't have been any more excited than I already was.

Figs are in season now! Not here, I know, but in California and in Greece. So much for my locavore cred. It's actually my dream to eat a fig fresh off a tree in Greece. California I don't care so much about because it's about a quarter as romantic a notion. Not that I would turn down a trip to California. What am I, well-insulated? Nope. Montreal's cold! By the time the figs get here from foreign lands they're good, but my tongue knows from how good they are now that they could be that much better. It anticipates the sweetness tinged with the tiniest bit of acidity that brings out the flavour that's missing.

So I went to my fruit guy, Leopoldo, in Jean-Talon Market. He still doesn't know he's a my fruit guy. Sometimes I speak French with him, and sometimes I speak English with him, and I haven't gotten up the guts to speak Italian with him because me and him and romantic notions like speaking Italian don't jive. Just imagine us jiving...Ridiculous.

He had boxes of fresh figs from both California (green and black kinds) and Greece (just black). The Greek ones were larger, plumper, and looked juicier. The Californians were slightly cheaper and smaller. So I bought a basket of green Californians, a basket of black Californians, and a box of Greeks. Into my Granny cart the box went, and the delicate baskets over my shoulder. Of course, there was no way I was waiting the 50 minute commute home to sample the figs...they are sprayed because they're imported, I think, so I did find some clean running water first.

Leopoldo said his favourites were the Greeks, but this is the first time we disagree. The Greeks were the most beautiful inside, and the juiciest, but the flavour was lacking. Looks were deceiving because the greens were actually the most delicious, though the skin was thicker and thus the texture not as nice. It wasn't like these were going to go to waste, but my plan was to take the ones I liked the least and make jam out of them. So the Greeks got jammed...after I ate a few more, just to make sure I was right.


Ingredients:
2 lbs fresh figs (you really have to buy a lot so you don't feel bad about cooking them. Just think of the fig jam you'll get to eat in the middle of winter when there are no fresh ones to be found. It's not about denying yourself now, it's about treating yourself later) 
1 1/3 cup cane sugar
zest and juice of 1 small lemon

Remove the tips of the figs if there are any. Some of the Greek ones didn't have any, so that was easy.
In a large saucepan combine the figs with the sugar, lemon juice and zest. Bring to a simmer over medium-low heat, stirring often. This takes awhile.
Cover and simmer over low heat for 1 hour, stirring occasionally. Then remove the lid and continue simmering, stirring often, until the mixture thickens. The original recipe said nothing about chopping the figs, so they'd been cooking whole this entire time, but that's very un-jam-like. So after an hour and fifteen minutes I crushed them with a slotted spoon. It made the jam thicken up faster, but you really need to stir often so it doesn't burn to the pot. 
You want it to get to the gel stage, which is thicker than you think. To test to make sure it's done put a small plate or saucer in the freezer for a few minutes, then take it out and put a little drop of the hot fig mixture on it. Then put it back in the freezer for 1 minute. Take it out and press the top of the jam down lightly with a finger. If it wrinkles a little then it's done.
While figs are cooking, you need to prepare the jars and lids. Sterilize: Wash jars, lids, and tightening rings with hot soapy water. Put a big pot of water on to boil (a canning pot - it has to be big enough to fit about eight 125mL cans or four 250mL jars so that the jars are covered on top by 2 inches of water). Boil the rings and cans (not the lids) for about 20 minutes. Then just leave the jars in the hot water (you can turn off the heat but leave the lid of the pot on) until you're ready to fill the jars. 

Put some more water in a small saucepan and bring it to a simmer. Then reduce the heat to low and add the jar lids. You never want to boil the lids because they seal with wax and so you don't want to melt it all in the water. Always use new lids, but you can use old (clean) jars and rings. Leave the lids in the slightly simmering water until you're ready to use them. the recipe didn't say how long to simmer, but I figured 10 minutes was more than plenty. They're new so you don't need to sterilize them in the same way as the jars and rings I guess?

Have some cloth towels ready (or something onto which you can set the hot jars down) and remove the jars and rings from the hot water. My slotted spoon/tongs methods works well. None of this fancy jar lifter business. French women probably didn't have such contraptions when they started making jam. You kind of need to do this relatively quickly, but if you're slow, it's okay as long as you don't put the cooled jars back into boiling water directly. Since the heat is turned off on the large pot you should be fine.

Fill the jars to the bottom lip (1/2 inch headspace). Wipe the rims of the jars and the threads with wet paper towel. Place the warmed lids on the jars using tongs (don't touch the rims now) and then you can use your hands (but still preferably tongs) to put on the rings. Then you'll have to use your hands to tighten the rings, but that's fine since the rims are covered. 
You kind of need to create some sort of rack to put at the bottom of the large canning pot of almost boiling water that you used to sterilize the jars since the filled jars shouldn't touch the bottom of the pot. I used a vegetable steamer since my cake rack was too big. Cake racks should be circular, I've decided. One day I will design a circular cake rack that is multipurpose. Then my life will be complete. I can make jam and cake using the same rack. What else could a girl want? Well, not diabetes, I suppose. 
Place the filled jars back in the water on top of your make-shift or purchased rack and bring the water back to a boil (if it stayed at a boil from before you save time, you need to fill the jars really fast so that they don't have time to cool off before they go back in the water. Boil the jars for 10 minutes. Start the timer only when the water comes back to a boil.

After 10 minutes take out the jar and set them upside down. I don't know if this helps but I've seen it in some recipes and I figure it can't hurt. When the jars are cool, tighten the lids a little more, and you're done! Ooh! Labels! Just in case you get all the jams you make messed up...yeah...right...

Monday, September 27, 2010

This Is What I Apparently Can't Get Myself To Save My Life...

We're going to play a little game...
Do you know what these are?

Most people reading this have probably never seen them before. I bought them for the first time in Vancouver at a market and as they were rock hard and inedible, I let them ripen for a few days. They started getting darker brown, shriveling up, and oozing a little. Well, that looked gross, so I threw them out. I guessed it was too warm and they were going bad instead of ripening properly.

As it turns out, that's what they're supposed to do. See how some are darker than others? Their nectar seeps out as they become the more shriveled version of themselves that you may actually recognize.

Don't worry, it's not your fault, since they don't grow here. If you lived in Iran or Tunisia you might recognize them. I assume this is one of the main types of the myriad that are grown there. In fact, I've only ever seen fresh ones on sale here from Tunisia, and generally I prefer the syrupy sweetness of the Iranian ones. They're different varietals, after all. Still, the Tunisian ones are the ones you'll find in this state and can let ripen on your counter (or in the case of Montreal in Fall, you can wait...and wait...and wait...), eating one by one as they ripen. If you leave them until they're just starting to darken and burst the sweetness is mild and the inside is still a little starchy - a world of difference from the dried fruit they can become. Just like people who've never had a fresh fig think they all taste like the dried ones. Well, does a grape taste like a raisin?

What do you get if you solve this riddle?

Well, hopefully a little laugh. A chuckle maybe. It's not "ha-ha" funny, really...It's more like when I was at a farmers' market in the rain standing partially under a tent, saying "It's not bad in here," just as a huge downpour of accumulated water ran off the edge of the tent onto the side and back half of my body...See? Hilarious. My life is hilarious.